Deploy Contract Using NextJS & WalletConnect
See the full GitHub Project Code Repository.
This developer guide will walk you through setting up a new NextJS web app, configuring the Berachain network details, setup basic wallet connection, and deploy your contract through a frontend with WalletConnect.
Requirements
Before beginning, make sure you have the following installed or setup on your computer before hand.
- NVM or Node
v20.11.0 pnpm,yarn, ornpm- Wallet that contains
BERAtoken (for deployment) - Check Berachain Testnet Faucet.
Creating NextJS Project Code Setup
Start by creating a new project folder for the project:
npx create-next-app@latest;

# [Expected Prompts & Responses]:
# ✔ What is your project named? … walletconnect-nextjs
# ✔ Would you like to use TypeScript? … No / _Yes_
# ✔ Would you like to use ESLint? … No / _Yes_
# ✔ Would you like to use Tailwind CSS? … No / _Yes_
# ✔ Would you like to use `src/` directory? … _No_ / Yes
# ✔ Would you like to use App Router? (recommended) … No / _Yes_
# ✔ Would you like to customize the default import alias (@/*)? … _No_ / Yes
# Creating a new Next.js app in /path/to/walletconnect-nextjs.
#
# Using npm.
#
# Initializing project with template: app-tw
#
# ...
#
# Success! Created walletconnect-nextjs at /path/to/walletconnect-nextjs

cd walletconnect-nextjs;
Adding Dependencies
# FROM: ./walletconnect-nextjs

pnpm add @web3modal/wagmi wagmi viem @tanstack/react-query;
Getting WalletConnect Project ID
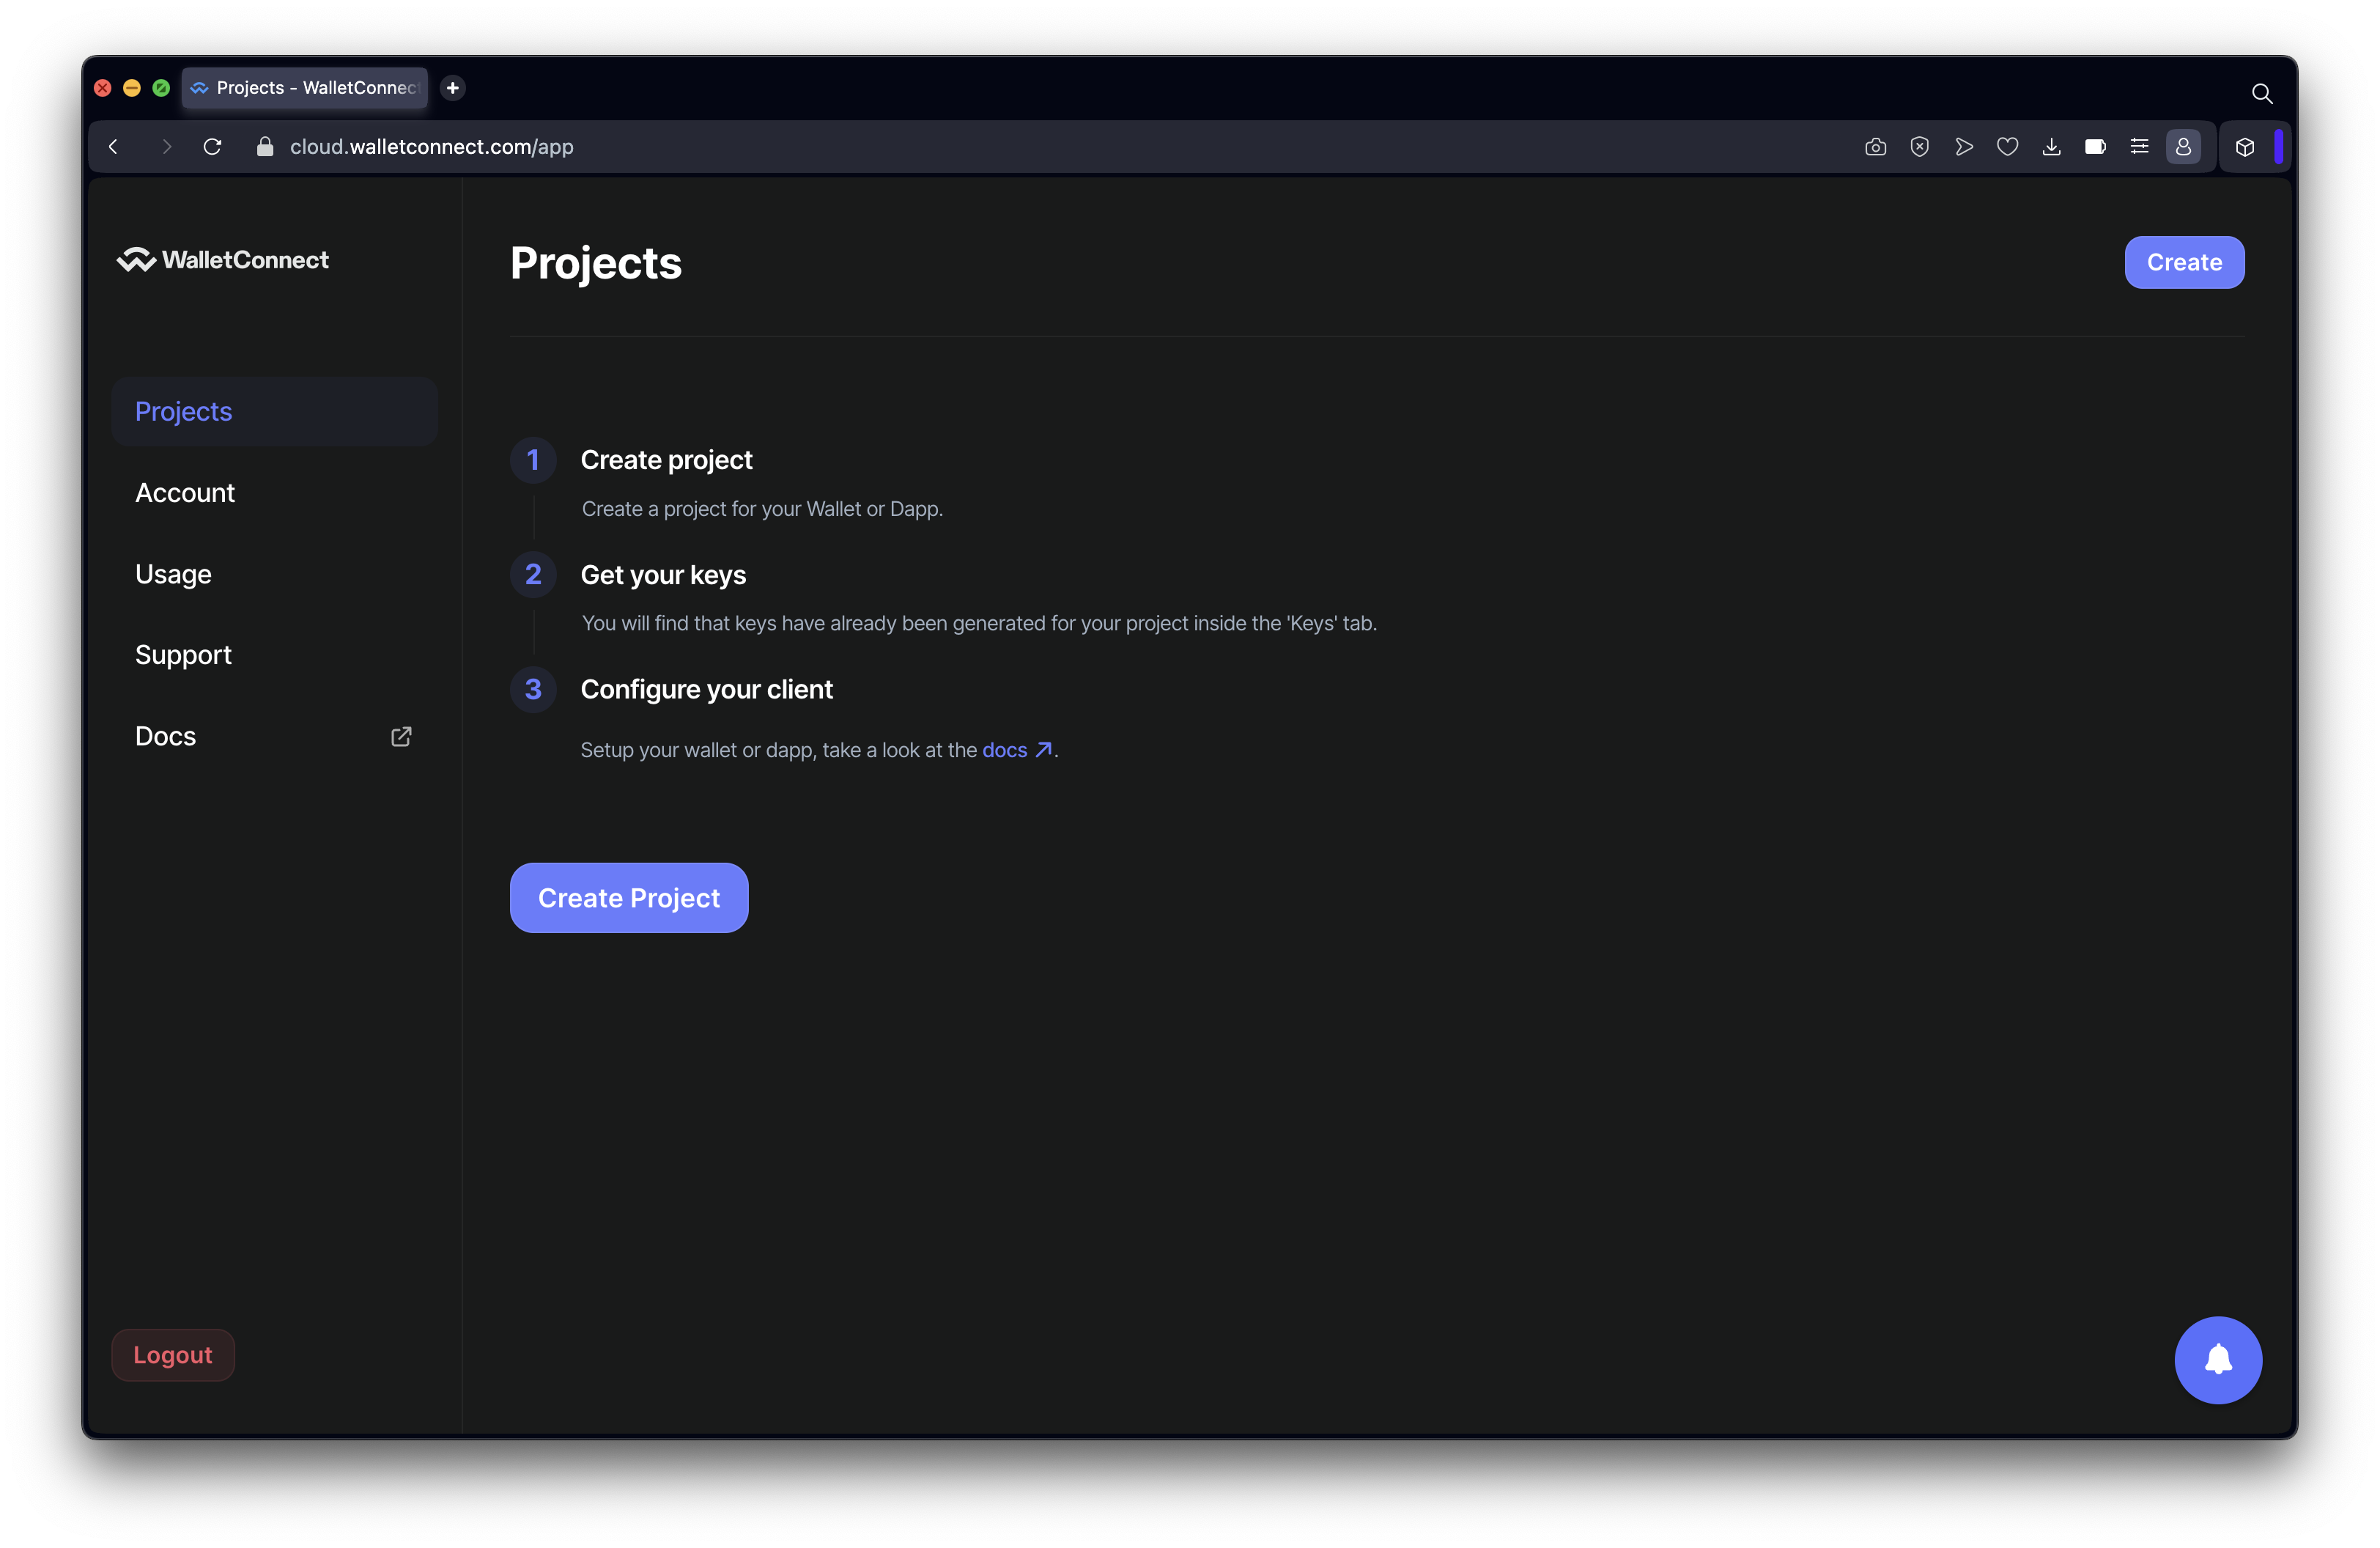
Got to https://cloud.walletconnect.com/, sign up for an account and create a new project to generate a Project ID.
We'll first need to create a new project.
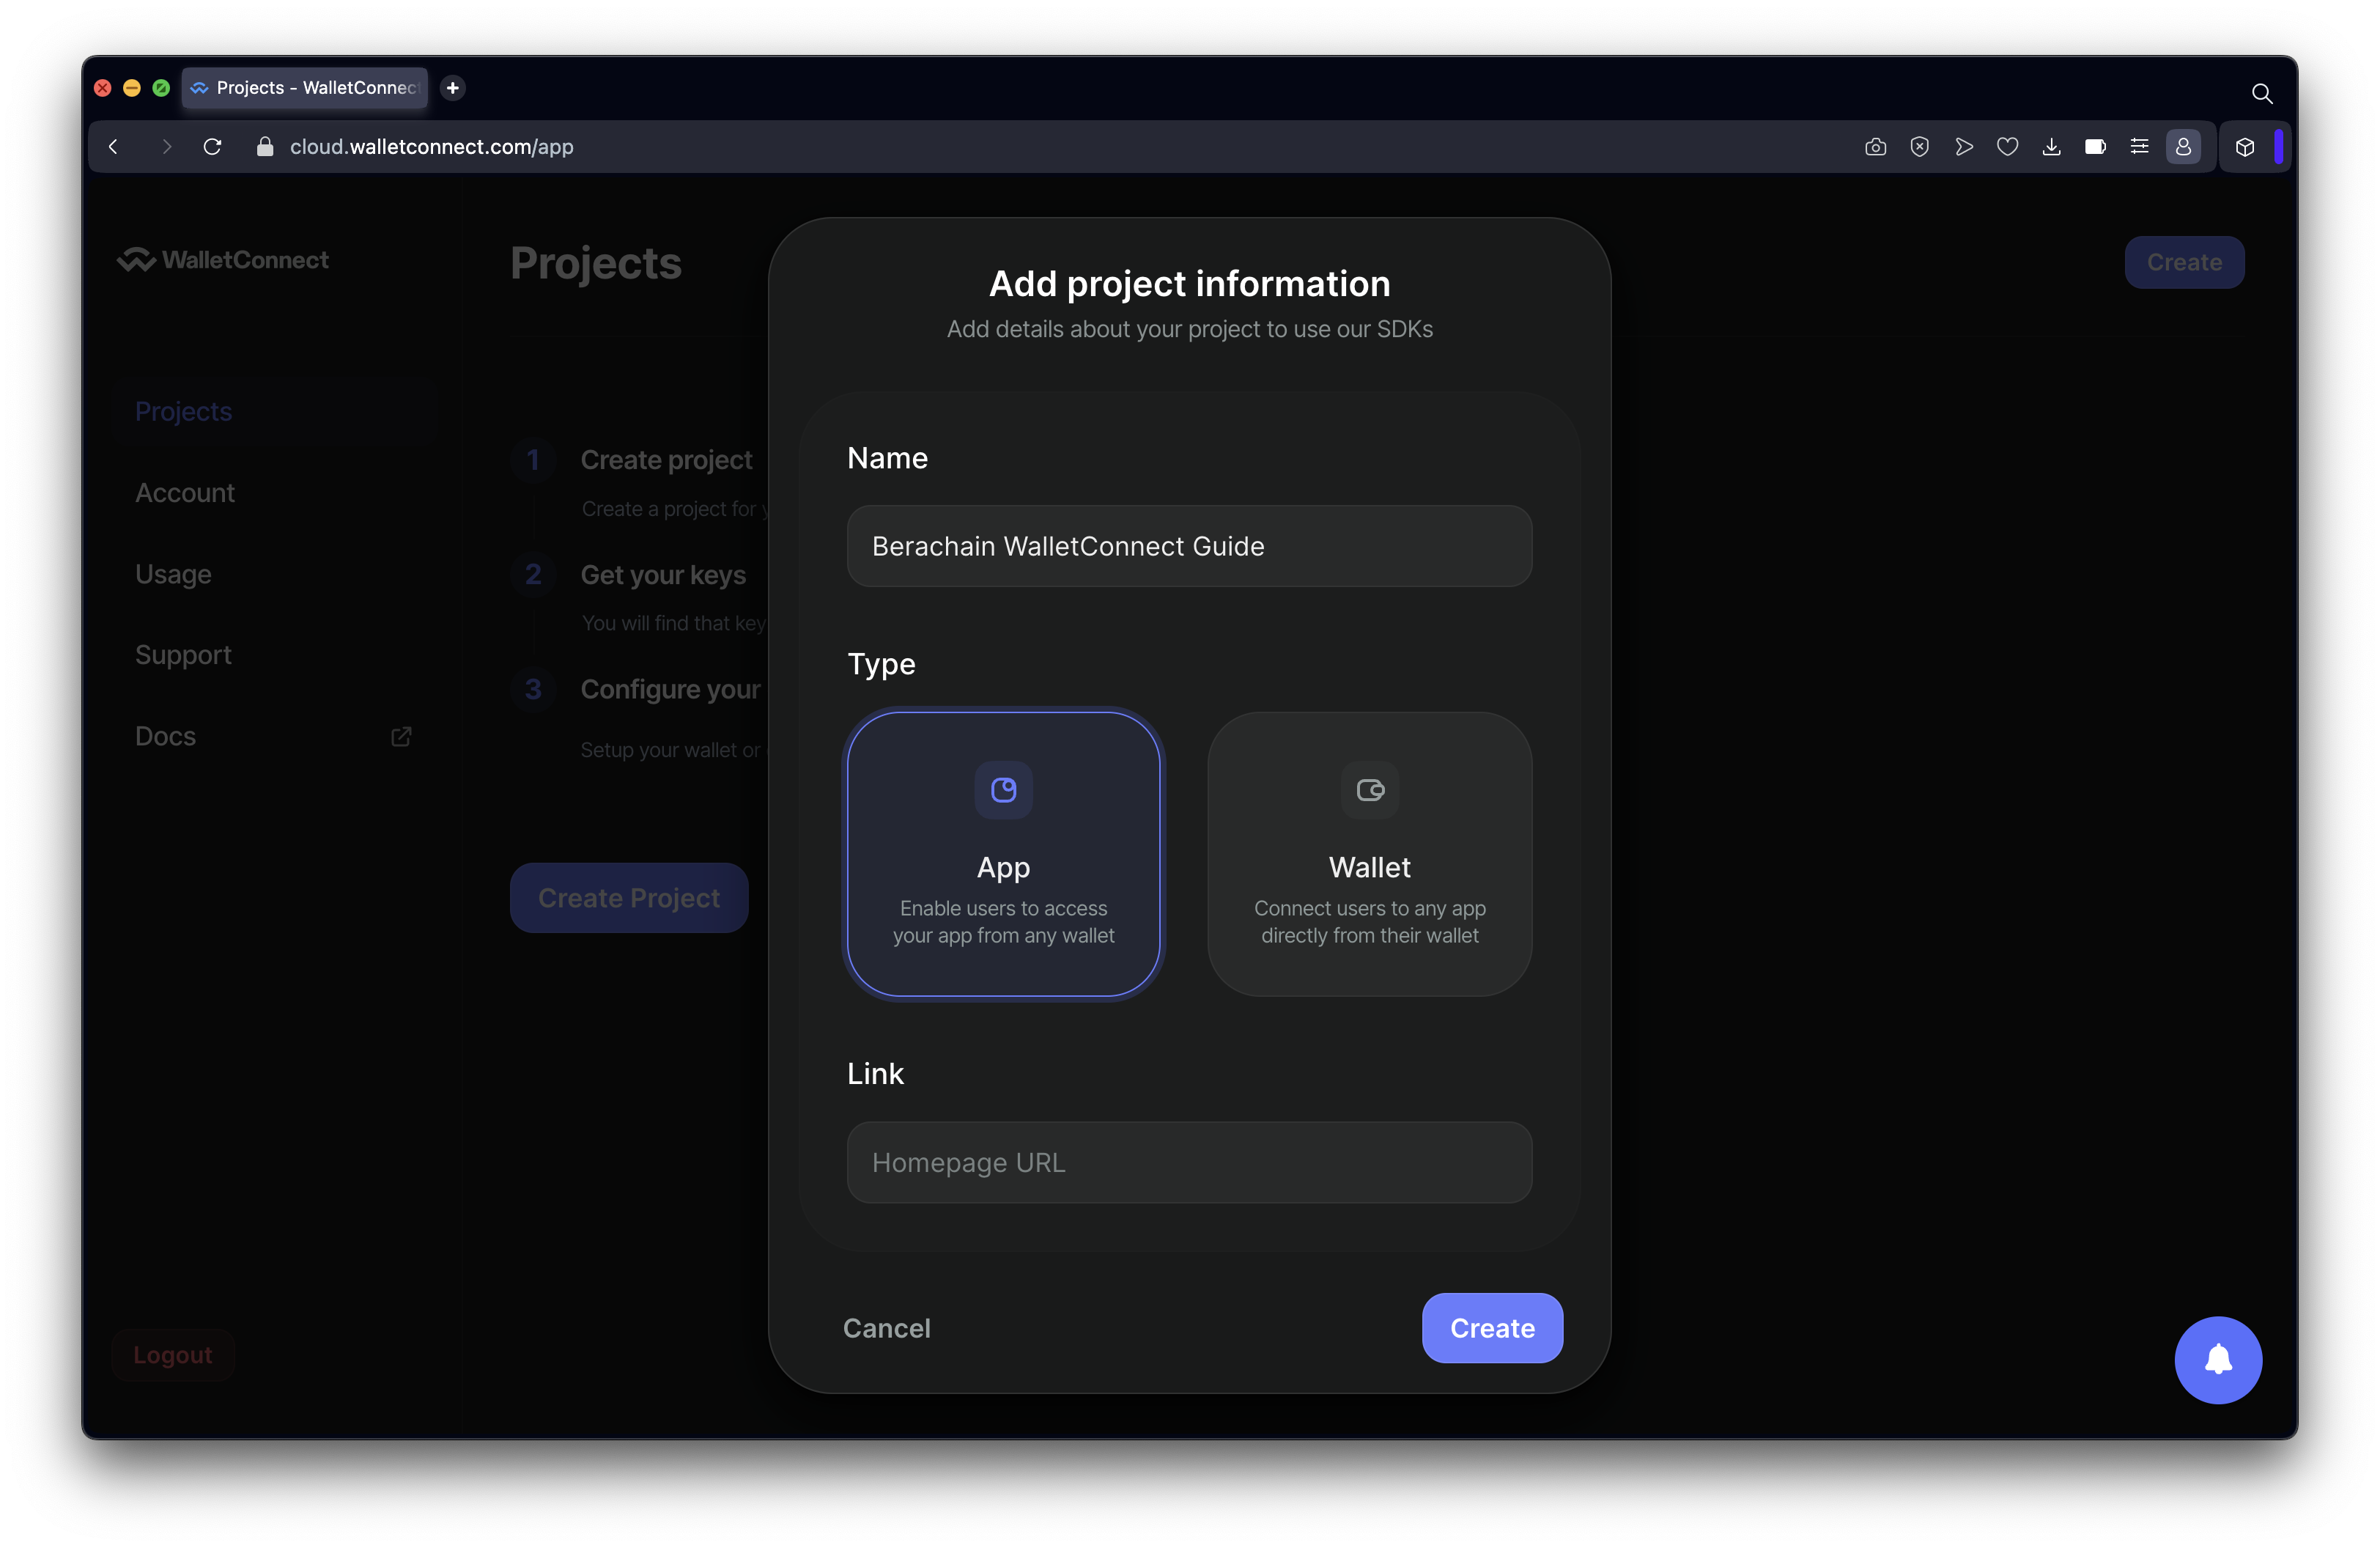
Add our project details.
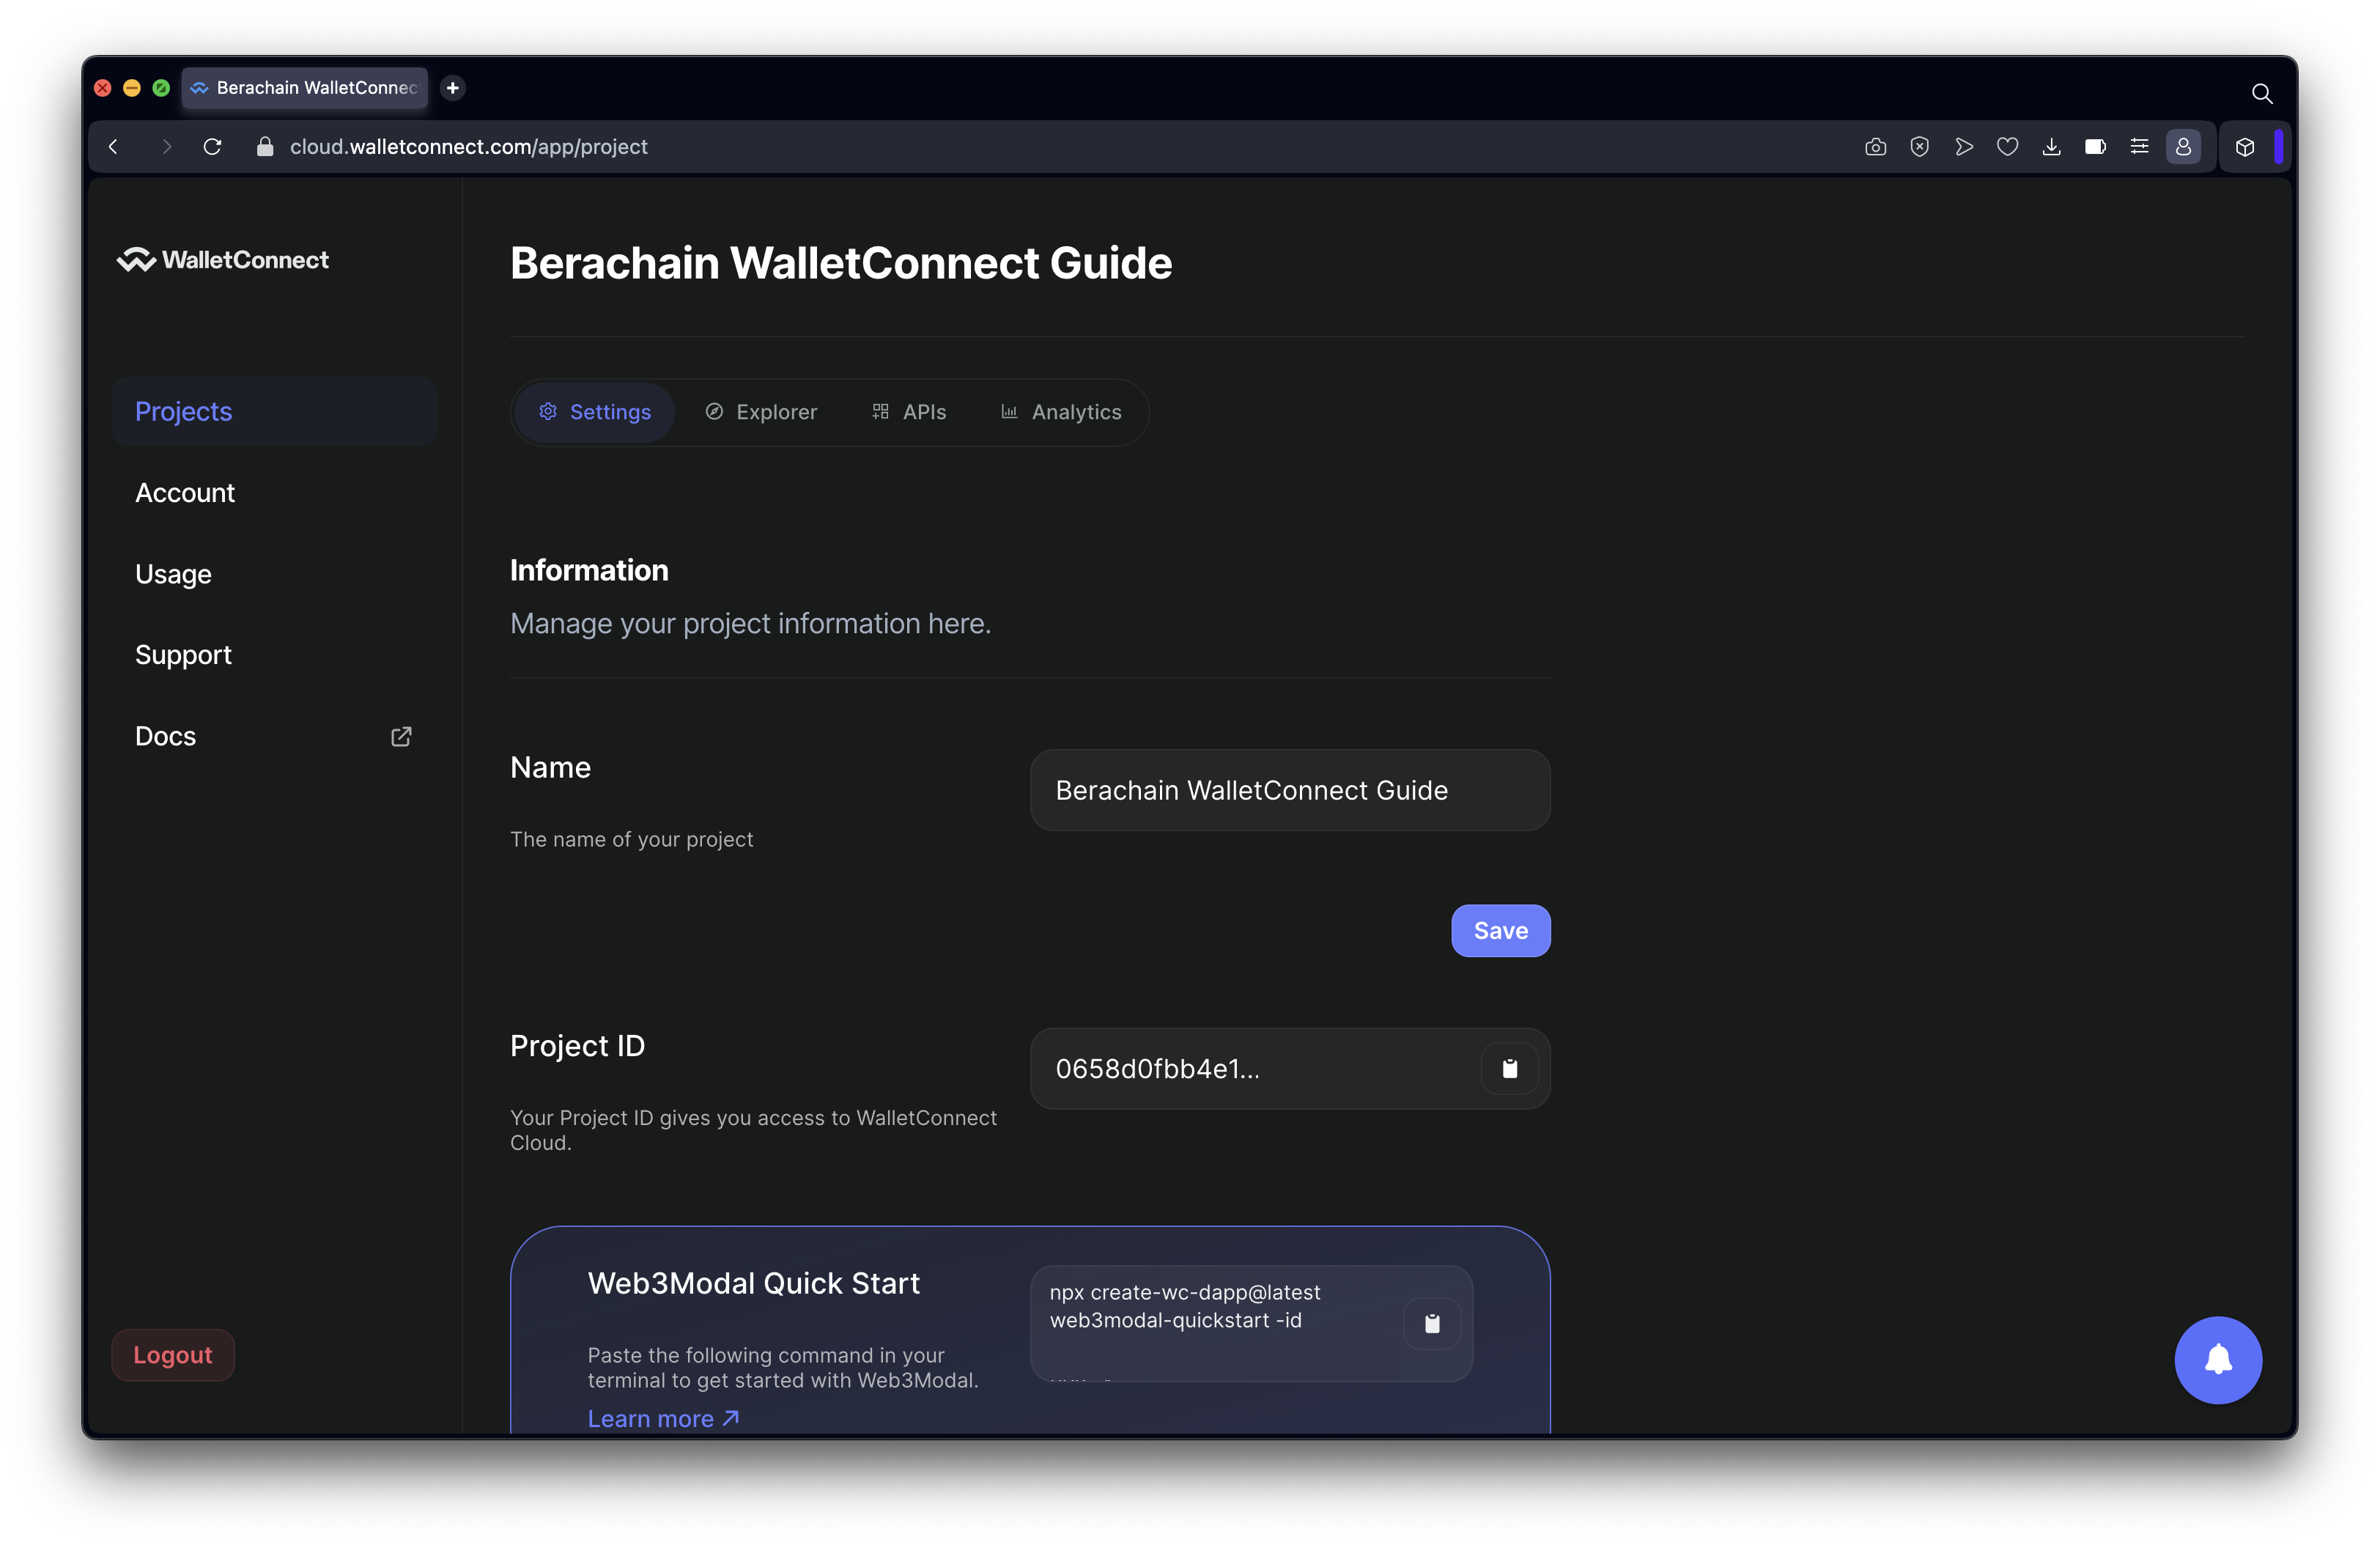
Get our project id.
Configuring WalletConnect
Once you have a Project ID, create a new .env variable in the repository.
# FROM: ./walletconnect-nextjs

touch .env;
Modify the file with the following details:
File: ./.env
# Get projectId at https://cloud.walletconnect.com
NEXT_PUBLIC_PROJECT_ID=YOUR-WALLETCONNECT-PROJECT-ID
Create a new config folder and file for web3modal:
# FROM: ./walletconnect-nextjs

mkdir config;
touch config/index.tsx;
In the config folder, add the following code:
File: ./config/index.tsx
// Imports
// ========================================================
import { defaultWagmiConfig } from "@web3modal/wagmi/react/config";
import { cookieStorage, createStorage } from "wagmi";
import { berachainTestnetbArtio } from "wagmi/chains";

// Constants
// ========================================================
// Get projectId at https://cloud.walletconnect.com
export const projectId = process.env.NEXT_PUBLIC_PROJECT_ID;

const metadata = {
  name: "Berachain Web3Modal",
  description: "Berachain Web3Modal Example",
  url: "https://web3modal.com", // origin must match your domain & subdomain
  icons: ["https://avatars.githubusercontent.com/u/96059542"]
};

if (!projectId) throw new Error("Project ID is not defined");

// Config
// ========================================================
export const config = defaultWagmiConfig({
  chains: [berachainTestnetbArtio], // required
  projectId, // required
  metadata, // required
  ssr: true,
  storage: createStorage({
    storage: cookieStorage
  }),
  enableWalletConnect: true, // Optional - true by default
  enableInjected: true, // Optional - true by default
  enableEIP6963: true, // Optional - true by default
  enableCoinbase: true // Optional - true by default
  //   ...wagmiOptions // Optional - Override createConfig parameters
});
Next create a new context folder that will wrap our application with the necessary context providers from tanstack and wagmi.
# FROM: ./walletconnect-nextjs

mkdir context;
touch context/index.tsx;
File: ./context/index.tsx
TIP
NOTE: There is a 'use client' at the top of this file to because it requires client-side rendering and needs to differentiate itself from the server-side.
"use client";

// Imports
// ========================================================
import React, { ReactNode } from "react";
import { config, projectId } from "@/config";
import { createWeb3Modal } from "@web3modal/wagmi/react";
import { QueryClient, QueryClientProvider } from "@tanstack/react-query";
import { State, WagmiProvider } from "wagmi";

// Config
// ========================================================
// Setup queryClient
const queryClient = new QueryClient({
  // Prevent refetch on window refos
  defaultOptions: {
    queries: {
      refetchOnWindowFocus: false
    }
  }
});

if (!projectId) throw new Error("Project ID is not defined");

// Create modal
createWeb3Modal({
  wagmiConfig: config,
  projectId,
  enableAnalytics: true // Optional - defaults to your Cloud configuration
});

// Exports
// ========================================================
export default function Web3Modal({
  children,
  initialState
}: {
  children: ReactNode;
  initialState?: State;
}) {
  return (
    <WagmiProvider config={config} initialState={initialState}>
      <QueryClientProvider client={queryClient}>{children}</QueryClientProvider>
    </WagmiProvider>
  );
}
Next modify our existing layout.tsx to account for these additional context providers.
File: ./app/layout.tsx
// Imports
// ========================================================
import type { Metadata } from "next";
import { headers } from "next/headers";
import "./globals.css";
import { cookieToInitialState } from "wagmi";
import { config } from "@/config";
import ContextProvider from "@/context";

// Metadata
// ========================================================
export const metadata: Metadata = {
  title: "Web3Modal Berachain",
  description: "Web3Modal Example With Berachain"
};

// Main Layout
// ========================================================
export default function RootLayout({ children }: { children: React.ReactNode }) {
  const initialState = cookieToInitialState(config, headers().get("cookie"));
  return (
    <html lang="en">
      <body>
        <ContextProvider initialState={initialState}>{children}</ContextProvider>
      </body>
    </html>
  );
}
Let's also add some styling that way our app looks a little bit nicer before we see things.
File: ./app/globals.css
@tailwind base;
@tailwind components;
@tailwind utilities;

@layer base {
  body {
    @apply bg-zinc-900 text-zinc-300;
  }

  h1 {
    @apply font-bold text-2xl mb-6 text-white;
  }

  h2 {
    @apply font-bold text-xl mb-6 text-white;
  }

  p {
    @apply mb-6;
  }

  .dot {
    @apply inline-flex w-3 h-3 rounded-full bg-black mr-2;
  }

  .dot.green {
    @apply bg-green-500;
  }

  .dot.red {
    @apply bg-red-500;
  }

  pre {
    @apply bg-zinc-800 p-8 rounded overflow-scroll max-h-72 mb-8;
  }

  code {
    @apply overflow-scroll;
  }

  form {
    @apply mb-8;
  }

  label {
    @apply flex text-sm text-zinc-400 mb-4;
  }

  textarea,
  input {
    @apply flex w-full rounded text-zinc-700 p-6 mb-8;
  }

  button,
  button[type="submit"] {
    @apply bg-zinc-700 text-white h-12 px-12 rounded-full hover:bg-zinc-600 transition-colors ease-in-out;
  }

  button:disabled,
  input:disabled,
  textarea:disabled {
    opacity: 0.1;
  }

  a:not(.button) {
    @apply text-red-400 underline;
  }

  a.button {
    @apply inline-flex items-center bg-blue-500 text-white h-12 px-12 rounded-full hover:bg-zinc-600 transition-colors ease-in-out;
  }
}
Adding Web3Modal Button
Now that we have our web app configured, let's add the web3modal button to allow for wallet connections.
File: ./app/page.tsx
// Imports
// ========================================================
// TBD

// Main Page
// ========================================================
export default function Home() {
  // Render
  return (
    <main className="p-8">
      <h1>🐻⛓️ Berachain WalletConnect Web3Modal Example</h1>
      <p>An example of Berachain being used with WalletConnect.</p>
      <div className="mb-8">
        <w3m-button />
      </div>
    </main>
  );
}
Start our app and confirm that you can connect with MetaMask.
# FROM: ./walletconnect-nextjs

pnpm dev;

# [Expected Output]:
# > walletconnect-nextjs@0.1.0 dev /path/to/walletconnect-nextjs
# > next dev
#
#    ▲ Next.js 14.1.0
#    - Local:        http://localhost:3000
#    - Environments: .env
#
#  ✓ Ready in 2.9s
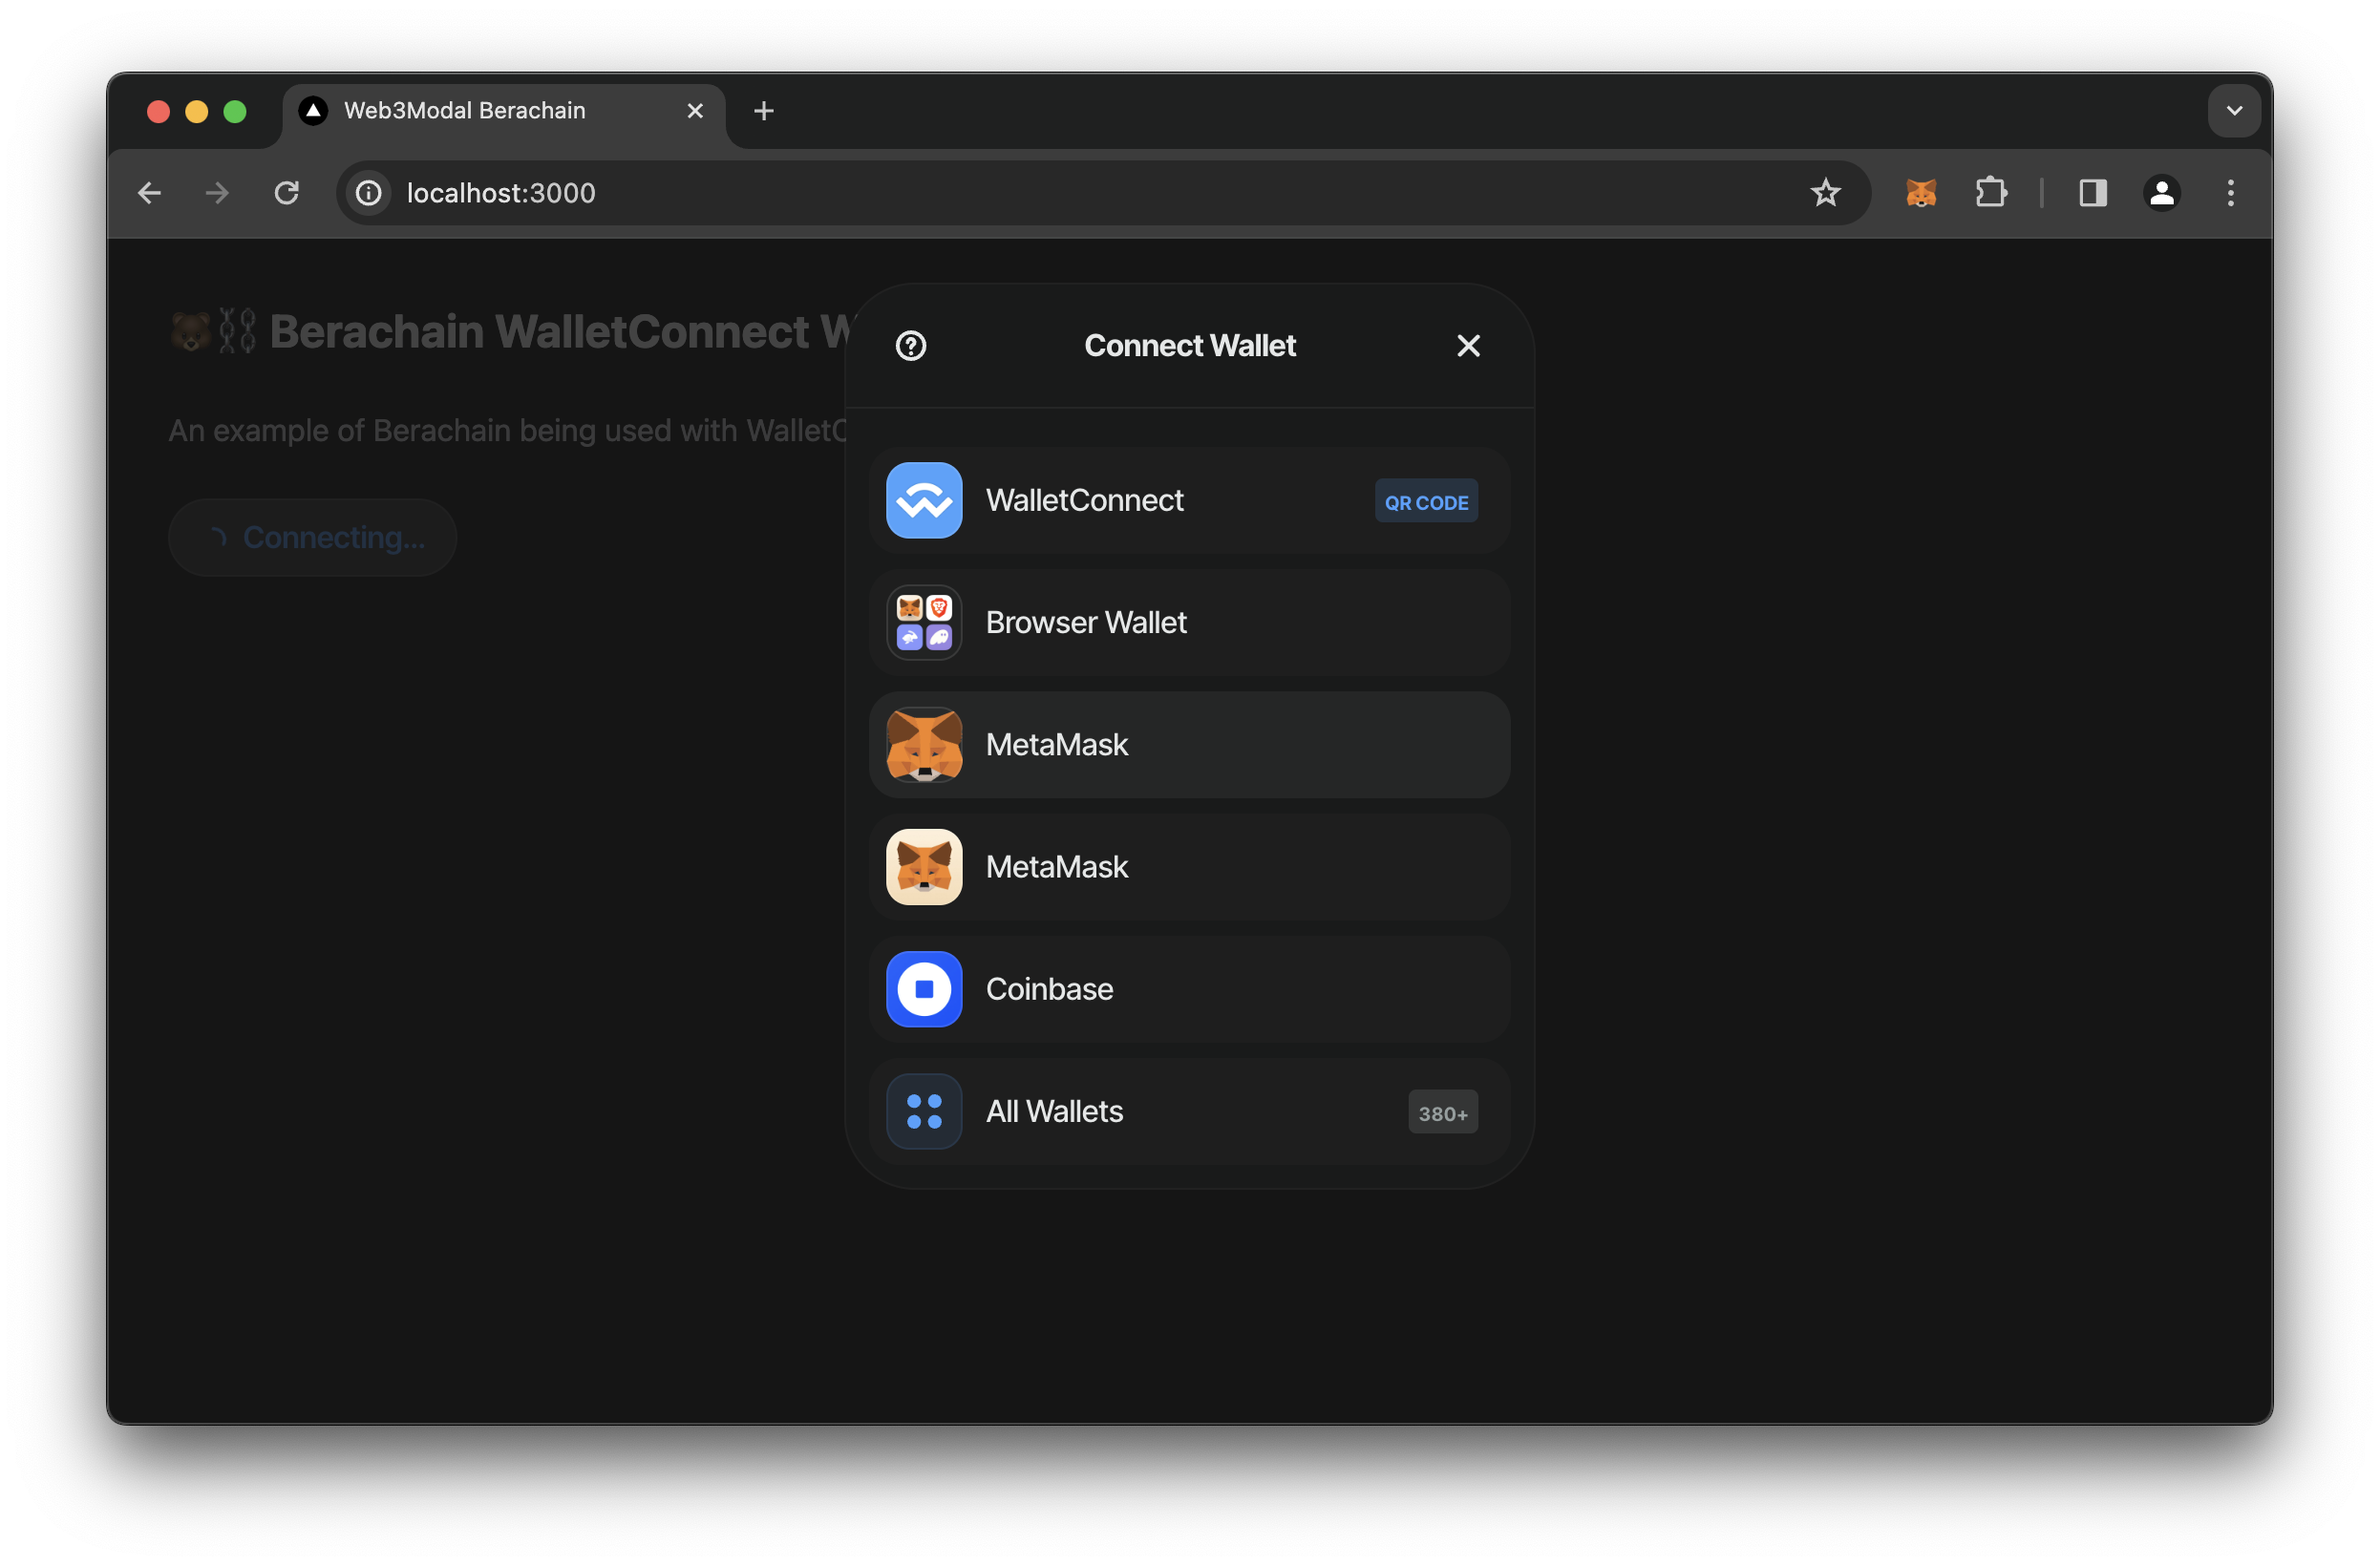
Demonstrating the web3modal button working.
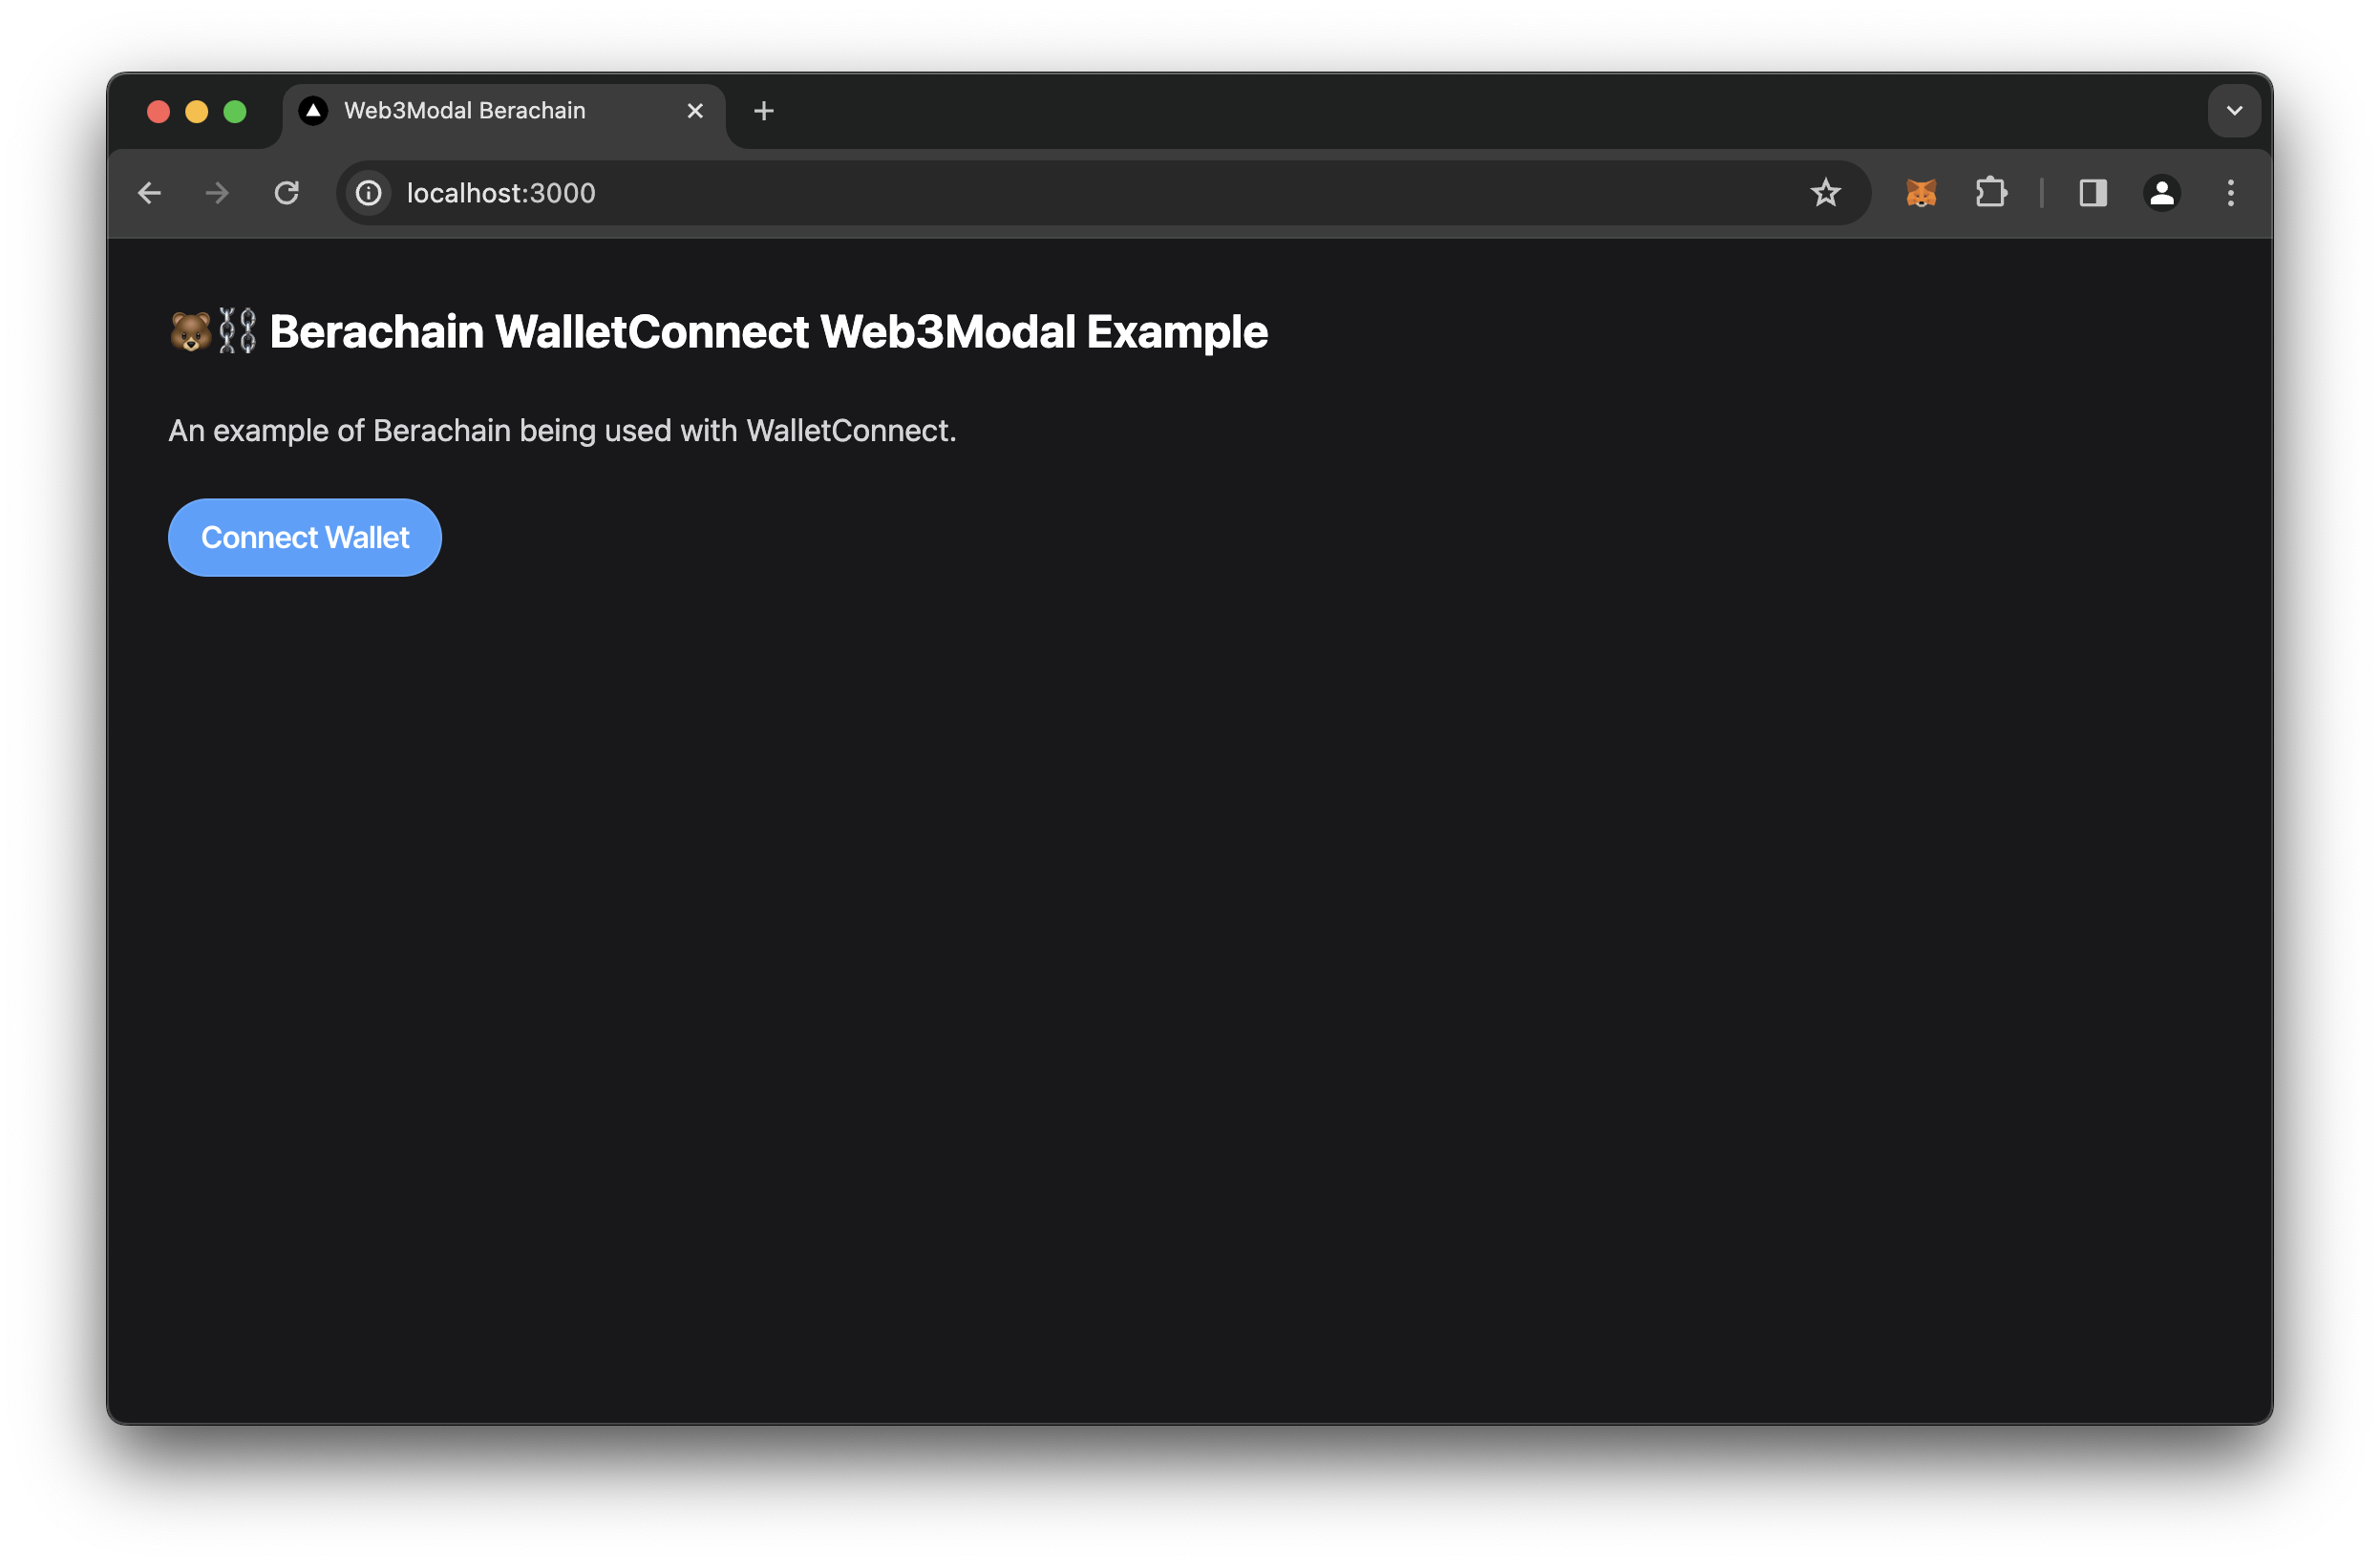
Connecting with web3modal.
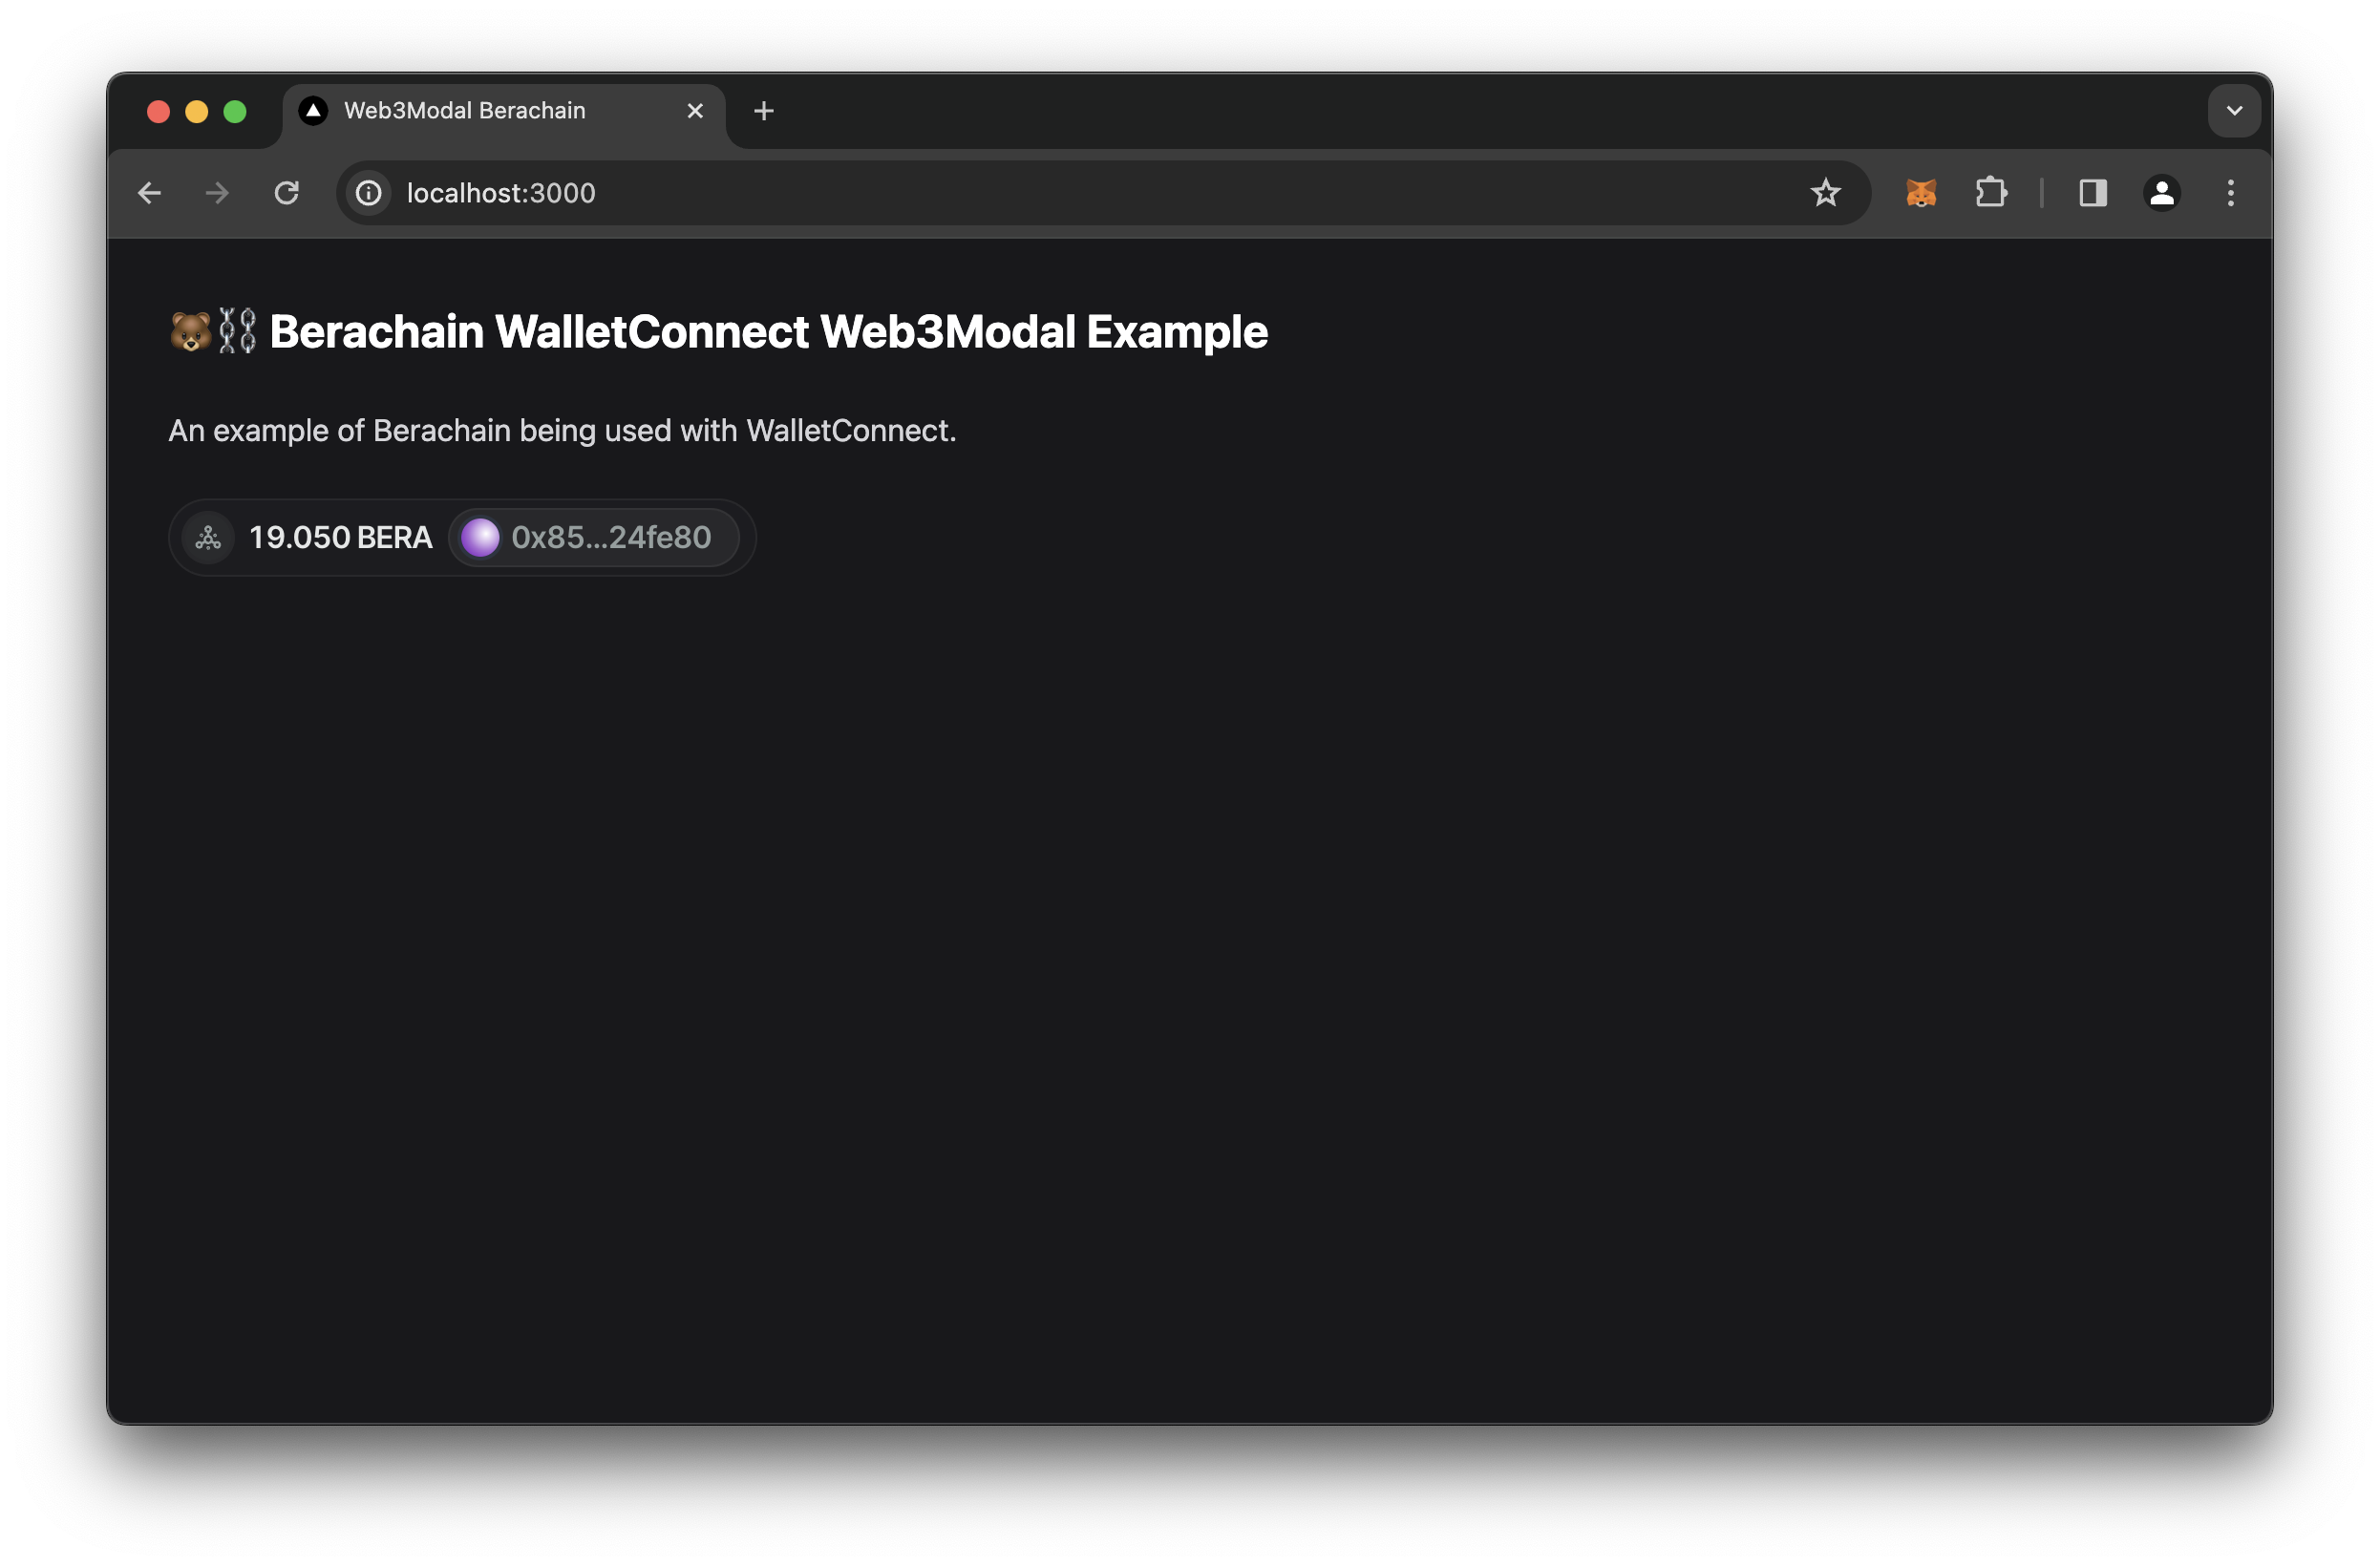
Successfully connected MetaMask.
Account Connected Component
With web3modal setup correctly, let's make an Account component that tests whether or not the account is connected using some of wagmi's existing hooks.
# FROM: ./walletconnect-nextjs

mkdir components;
mkdir components/Account;
touch components/Account/index.tsx;
We're going to create a component that checks if the account is connected or now.
File: ./components/Account/index.tsx
"use client";

// Imports
// ========================================================
import { useAccount, useContractRead } from "wagmi";

// Main Page
// ========================================================
export default function Account() {
  // Hooks
  const { isConnected } = useAccount();

  // Render
  return (
    <section className="pb-6 mb-6 border-zinc-700 border-b">
      <>
        <h2>Account Connection</h2>
        {isConnected ? (
          <div>
            <span className="dot green"></span>
            Connected
          </div>
        ) : (
          <div>
            <span className="dot red"></span>
            Account NOT Connected
          </div>
        )}
      </>
    </section>
  );
}
Add it to our main page.tsx file.
File: ./app/page.tsx
// Imports
// ========================================================
import Account from "@/components/Account";

// Main Page
// ========================================================
export default function Home() {
  // Render
  return (
    <main className="p-8">
      <h1>🐻⛓️ Berachain WalletConnect Web3Modal Example</h1>
      <p>An example of Berachain being used with WalletConnect.</p>
      <div className="mb-8">
        <w3m-button />
      </div>
      <Account /> // [!code ++]
    </main>
  );
}
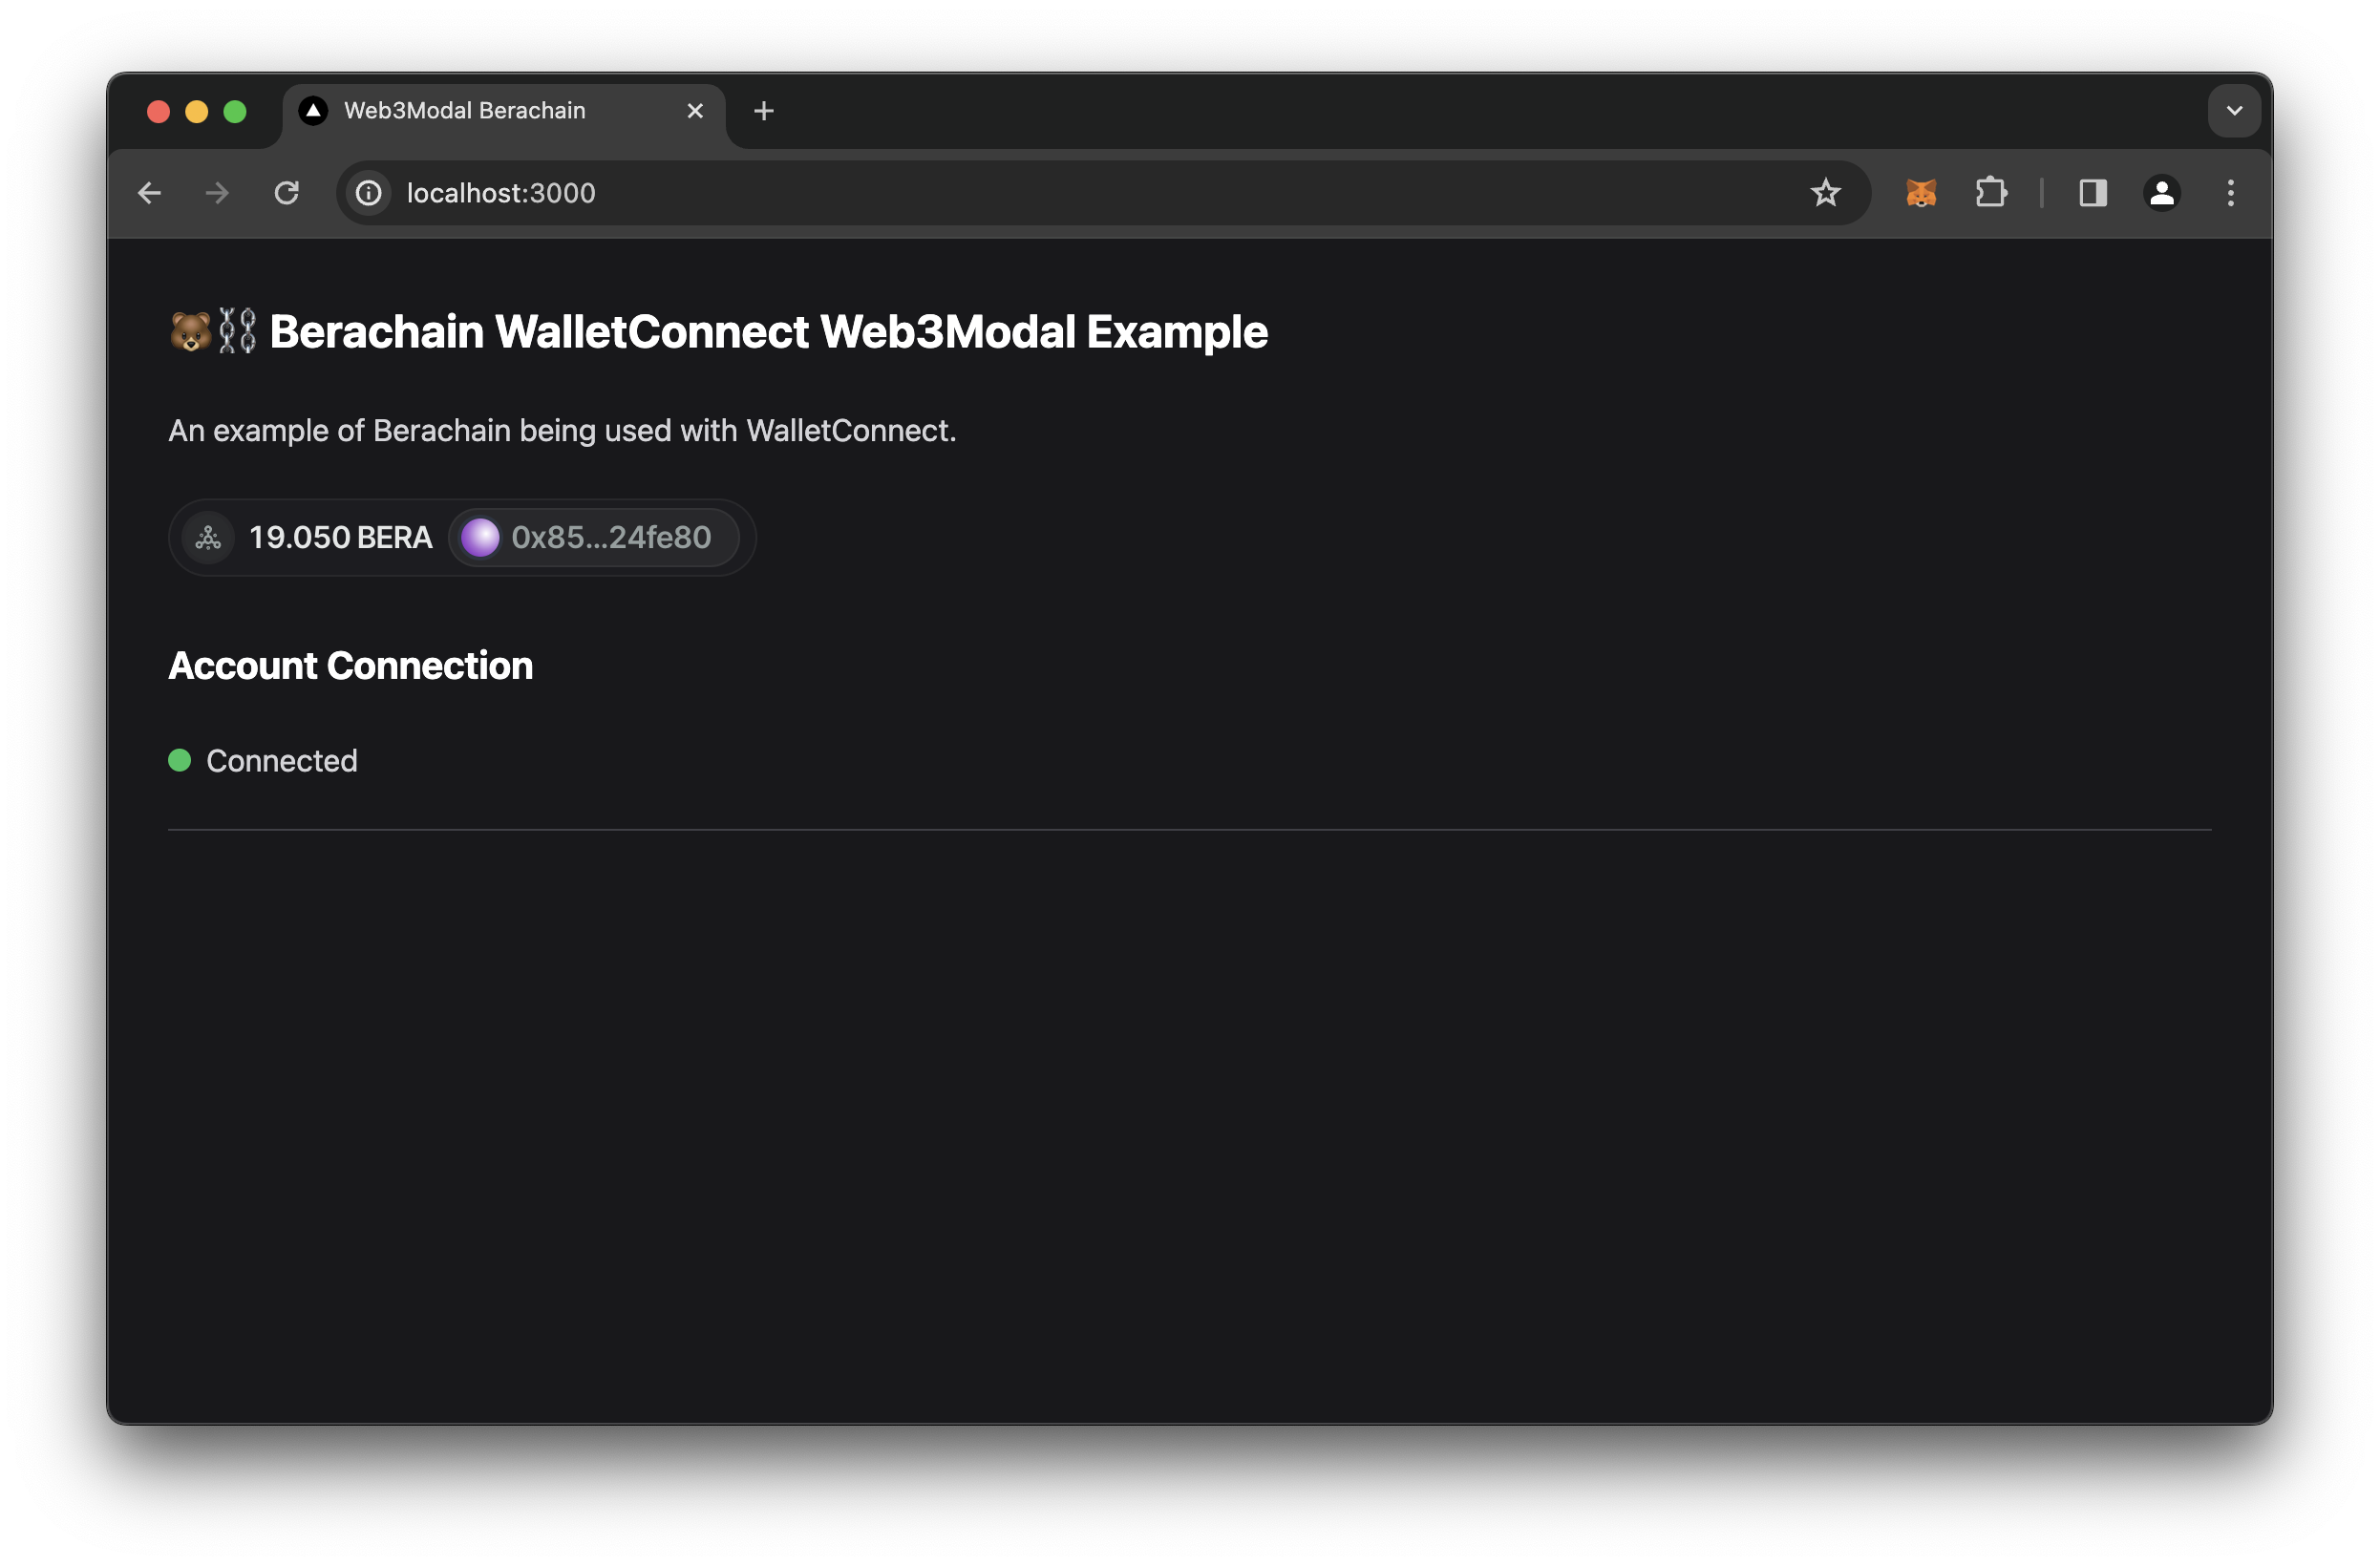
When looking at the app, we should now see a component showing that the user is either successfully connected or not.
SignMessage Component
Another functionality that we'd like to demonstrate is the basic wallet signature working. For this, we're going to create another component called SignMessage and add functionality to sign and verify a message.
# FROM: ./walletconnect-nextjs

mkdir components/SignMessage;
touch components/SignMessage/index.tsx;
File: ./components/SignMessage/index.tsx
"use client";

// Imports
// ========================================================
import { useAccount, useSignMessage, useVerifyMessage } from "wagmi";
import { useState } from "react";
import { berachainTestnet } from "wagmi/chains";

// Main Page
// ========================================================
export default function SignMessage() {
  // Hooks
  const { isConnected, address } = useAccount();
  const [message, setMessage] = useState("");
  const [signature, setSignature] = useState<`0x${string}`>("0x");
  const [result, setResult] = useState("");
  const { signMessageAsync } = useSignMessage();
  const verification = useVerifyMessage({
    chainId: berachainTestnet.id,
    address,
    message,
    signature
  });

  // Functions
  /**
   * @dev Handles signing messages from whatever is placed in textarea
   * @param event
   */
  const onSubmitSignMessage = async (event: React.FormEvent<HTMLFormElement>) => {
    event.preventDefault();
    console.group("onSubmitSignMessage");

    try {
      const signature = await signMessageAsync({
        message
      });
      setSignature(signature);
      setResult(signature);
      verification.refetch();
    } catch (error: any) {
      console.error(error?.reason);
      console.error(error);
      setResult(error?.reason ?? error?.message);
    }

    console.groupEnd();
  };

  // Render
  return (
    <section className="pb-6 mb-6 border-zinc-700 border-b">
      <>
        <h2>Sign Message</h2>

        {isConnected ? (
          <div>
            <form onSubmit={onSubmitSignMessage}>
              <div>
                <label>Message</label>
                <textarea
                  value={message}
                  onChange={(e) => setMessage(e.target.value)}
                  placeholder="Ex: My Message"
                />
              </div>
              <div>
                <button disabled={!message} type="submit">
                  Sign
                </button>
              </div>
            </form>

            {result ? (
              <div>
                <label>Signature Result</label>
                <pre>
                  <code>{result}</code>
                </pre>

                <label>Verification Result</label>
                <pre>
                  <code>
                    {verification.status === "pending"
                      ? `Status: ${verification.status}\n\nVerifying...`
                      : ""}
                    {verification.status === "error"
                      ? `Status: ${verification.status}\n\n${verification?.failureReason?.message}`
                      : ""}
                    {verification.status === "success"
                      ? `Status: ${verification.status}\n\nVerified signature and message`
                      : ""}
                  </code>
                </pre>
              </div>
            ) : null}
          </div>
        ) : (
          <div>
            <pre>
              <code>Not Connected</code>
            </pre>
          </div>
        )}
      </>
    </section>
  );
}
Add this component to our main page.tsx file.
File: ./app/page.tsx
// Imports
// ========================================================
import Account from "@/components/Account";
import SignMessage from "@/components/SignMessage";

// Main Page
// ========================================================
export default function Home() {
  // Render
  return (
    <main className="p-8">
      <h1>🐻⛓️ Berachain WalletConnect Web3Modal Example</h1>
      <p>An example of Berachain being used with WalletConnect.</p>
      <div className="mb-8">
        <w3m-button />
      </div>
      <Account />
      <SignMessage /> // [!code ++]
    </main>
  );
}
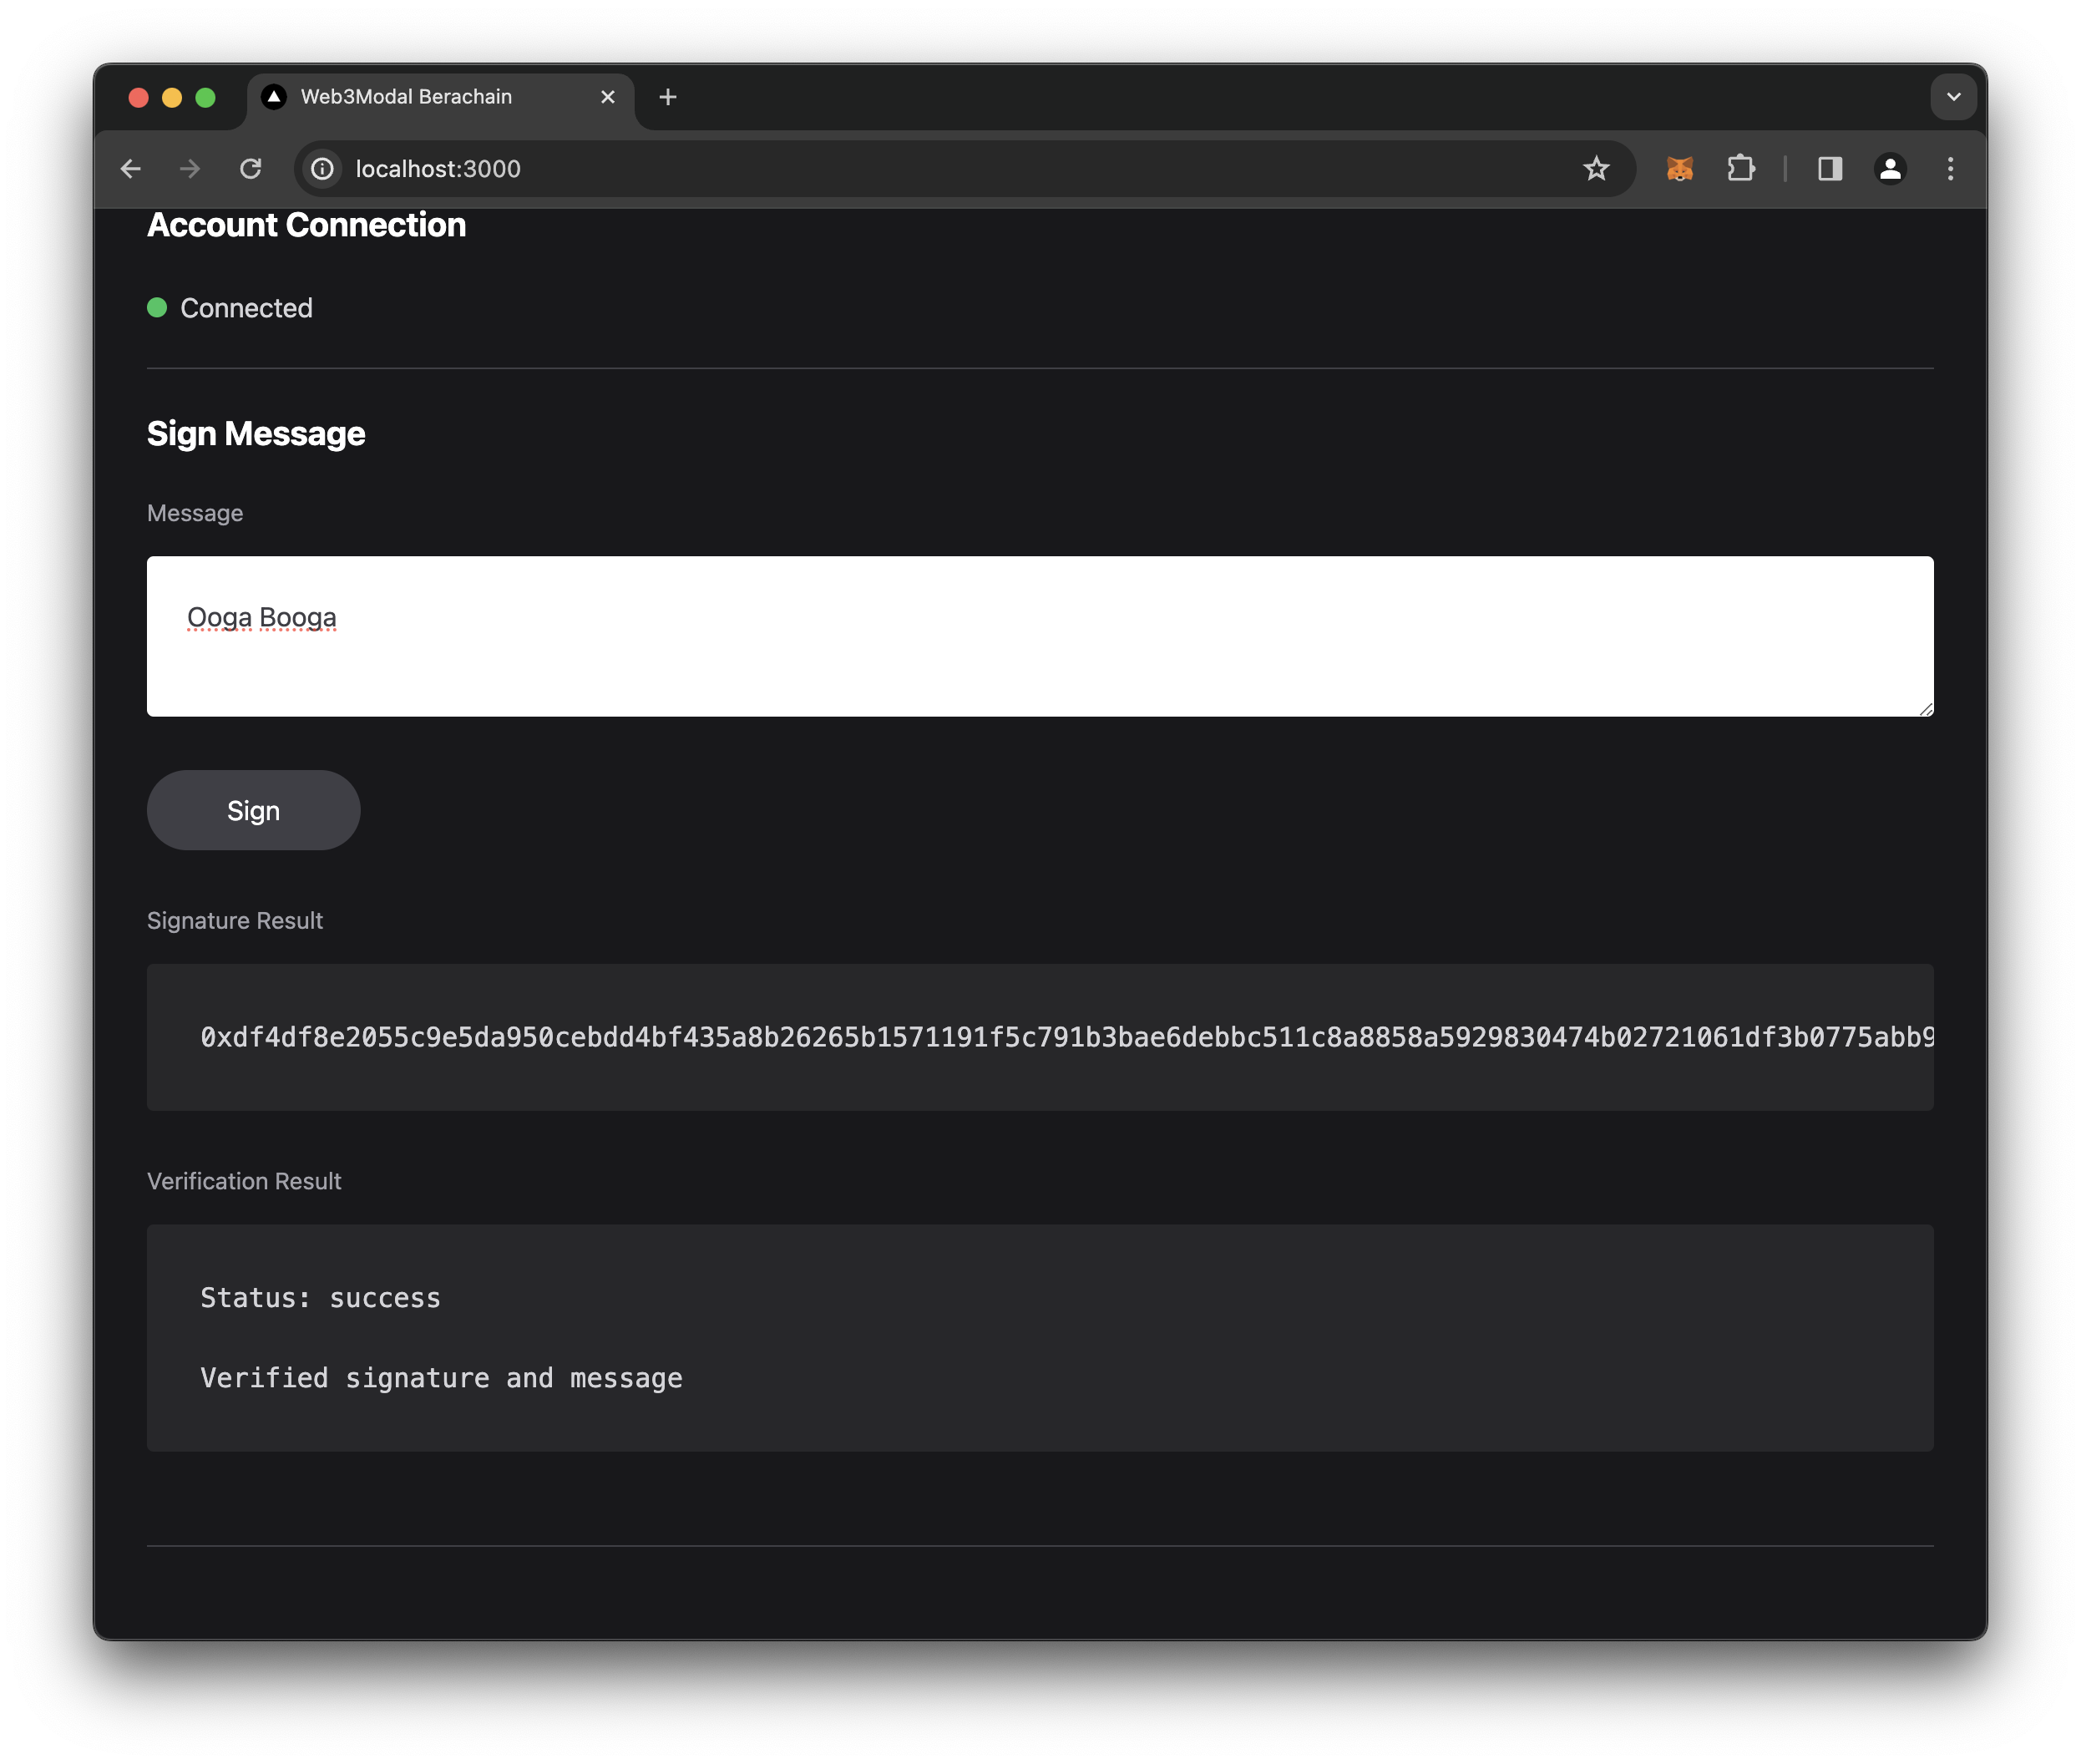
Now we should see a prompt to enter a message.
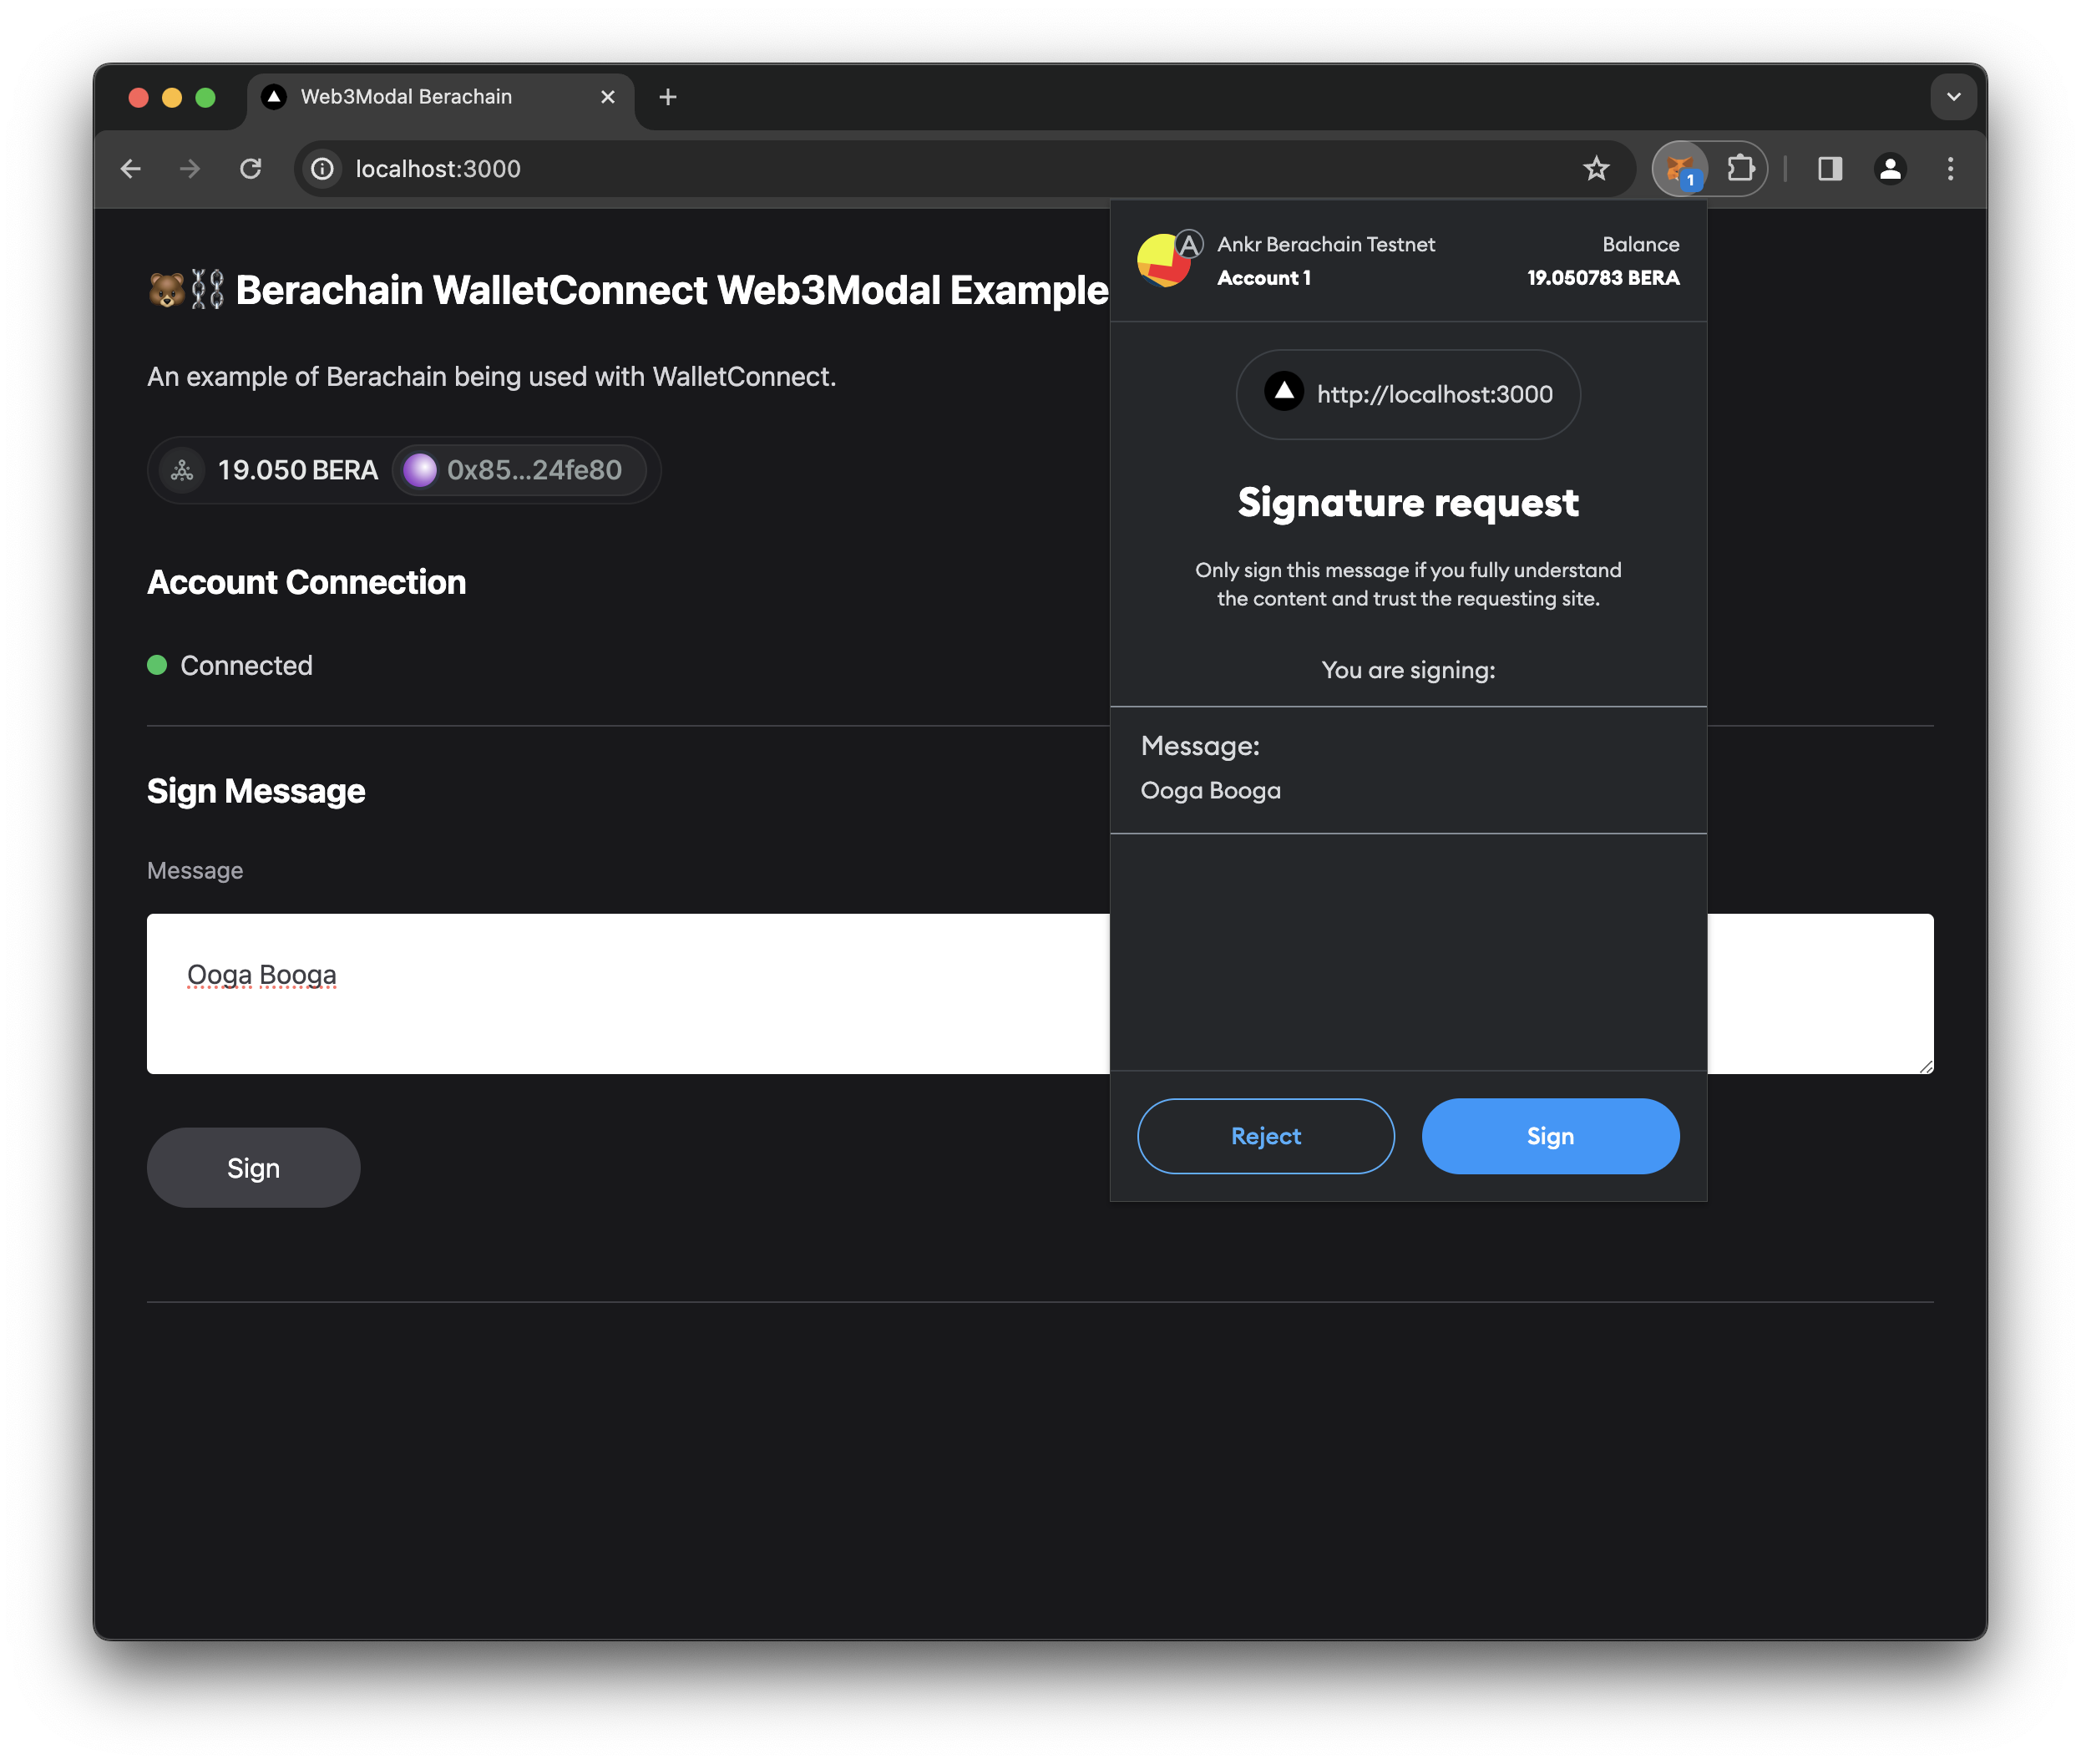
When signed, we should see a successful signature and its verification.
Deploy Contract Component
Lastly, we want to demonstrate deploying a contracts existing bytecode directly from the frontend, which prompts our wallet to initiate the transaction.
# FROM: ./walletconnect-nextjs

mkdir components/Deploy;
touch components/Deploy/index.tsx;
TIP
ByteCode: If you're curious aboutt the bytecode, it's the compiled bytecode from the Create HelloWorld Contract.
File: ./components/Deploy.tsx
"use client";

// Imports
// ========================================================
import { useAccount, useWaitForTransactionReceipt } from "wagmi";
import { useState } from "react";
import { encodeAbiParameters } from "viem";
import { berachainTestnet } from "wagmi/chains";

// Constants
// ========================================================
/**
 * @dev All inputs and outputs of Contract
 */
const CONTRACT_ABI = [
  {
    inputs: [
      {
        internalType: "string",
        name: "_greeting",
        type: "string"
      }
    ],
    stateMutability: "nonpayable",
    type: "constructor"
  },
  {
    anonymous: false,
    inputs: [
      {
        indexed: false,
        internalType: "address",
        name: "sender",
        type: "address"
      },
      {
        indexed: false,
        internalType: "string",
        name: "message",
        type: "string"
      }
    ],
    name: "NewGreeting",
    type: "event"
  },
  {
    inputs: [],
    name: "getGreeting",
    outputs: [
      {
        internalType: "string",
        name: "",
        type: "string"
      }
    ],
    stateMutability: "view",
    type: "function"
  },
  {
    inputs: [
      {
        internalType: "string",
        name: "_greeting",
        type: "string"
      }
    ],
    name: "setGreeting",
    outputs: [],
    stateMutability: "nonpayable",
    type: "function"
  }
];

/**
 * @dev full contract bytecode for deployment
 */
const CONTRACT_BYTECODE =
  "0x60806040523480156200001157600080fd5b5060405162000da238038062000da283398181016040528101906200003791906200021e565b8060009081620000489190620004ba565b507fcbc299eeb7a1a982d3674880645107c4fe48c3227163794e48540a752272235433826040516200007c92919062000638565b60405180910390a1506200066c565b6000604051905090565b600080fd5b600080fd5b600080fd5b600080fd5b6000601f19601f8301169050919050565b7f4e487b7100000000000000000000000000000000000000000000000000000000600052604160045260246000fd5b620000f482620000a9565b810181811067ffffffffffffffff82111715620001165762000115620000ba565b5b80604052505050565b60006200012b6200008b565b9050620001398282620000e9565b919050565b600067ffffffffffffffff8211156200015c576200015b620000ba565b5b6200016782620000a9565b9050602081019050919050565b60005b838110156200019457808201518184015260208101905062000177565b60008484015250505050565b6000620001b7620001b1846200013e565b6200011f565b905082815260208101848484011115620001d657620001d5620000a4565b5b620001e384828562000174565b509392505050565b600082601f8301126200020357620002026200009f565b5b815162000215848260208601620001a0565b91505092915050565b60006020828403121562000237576200023662000095565b5b600082015167ffffffffffffffff8111156200025857620002576200009a565b5b6200026684828501620001eb565b91505092915050565b600081519050919050565b7f4e487b7100000000000000000000000000000000000000000000000000000000600052602260045260246000fd5b60006002820490506001821680620002c257607f821691505b602082108103620002d857620002d76200027a565b5b50919050565b60008190508160005260206000209050919050565b60006020601f8301049050919050565b600082821b905092915050565b600060088302620003427fffffffffffffffffffffffffffffffffffffffffffffffffffffffffffffffff8262000303565b6200034e868362000303565b95508019841693508086168417925050509392505050565b6000819050919050565b6000819050919050565b60006200039b620003956200038f8462000366565b62000370565b62000366565b9050919050565b6000819050919050565b620003b7836200037a565b620003cf620003c682620003a2565b84845462000310565b825550505050565b600090565b620003e6620003d7565b620003f3818484620003ac565b505050565b5b818110156200041b576200040f600082620003dc565b600181019050620003f9565b5050565b601f8211156200046a576200043481620002de565b6200043f84620002f3565b810160208510156200044f578190505b620004676200045e85620002f3565b830182620003f8565b50505b505050565b600082821c905092915050565b60006200048f600019846008026200046f565b1980831691505092915050565b6000620004aa83836200047c565b9150826002028217905092915050565b620004c5826200026f565b67ffffffffffffffff811115620004e157620004e0620000ba565b5b620004ed8254620002a9565b620004fa8282856200041f565b600060209050601f8311600181146200053257600084156200051d578287015190505b6200052985826200049c565b86555062000599565b601f1984166200054286620002de565b60005b828110156200056c5784890151825560018201915060208501945060208101905062000545565b868310156200058c578489015162000588601f8916826200047c565b8355505b6001600288020188555050505b505050505050565b600073ffffffffffffffffffffffffffffffffffffffff82169050919050565b6000620005ce82620005a1565b9050919050565b620005e081620005c1565b82525050565b600082825260208201905092915050565b600062000604826200026f565b620006108185620005e6565b93506200062281856020860162000174565b6200062d81620000a9565b840191505092915050565b60006040820190506200064f6000830185620005d5565b8181036020830152620006638184620005f7565b90509392505050565b610726806200067c6000396000f3fe608060405234801561001057600080fd5b50600436106100365760003560e01c8063a41368621461003b578063fe50cc7214610057575b600080fd5b610055600480360381019061005091906102ad565b610075565b005b61005f6100c1565b60405161006c9190610375565b60405180910390f35b806000908161008491906105ad565b507fcbc299eeb7a1a982d3674880645107c4fe48c3227163794e48540a752272235433826040516100b69291906106c0565b60405180910390a150565b6060600080546100d0906103c6565b80601f01602080910402602001604051908101604052809291908181526020018280546100fc906103c6565b80156101495780601f1061011e57610100808354040283529160200191610149565b820191906000526020600020905b81548152906001019060200180831161012c57829003601f168201915b5050505050905090565b6000604051905090565b600080fd5b600080fd5b600080fd5b600080fd5b6000601f19601f8301169050919050565b7f4e487b7100000000000000000000000000000000000000000000000000000000600052604160045260246000fd5b6101ba82610171565b810181811067ffffffffffffffff821117156101d9576101d8610182565b5b80604052505050565b60006101ec610153565b90506101f882826101b1565b919050565b600067ffffffffffffffff82111561021857610217610182565b5b61022182610171565b9050602081019050919050565b82818337600083830152505050565b600061025061024b846101fd565b6101e2565b90508281526020810184848401111561026c5761026b61016c565b5b61027784828561022e565b509392505050565b600082601f83011261029457610293610167565b5b81356102a484826020860161023d565b91505092915050565b6000602082840312156102c3576102c261015d565b5b600082013567ffffffffffffffff8111156102e1576102e0610162565b5b6102ed8482850161027f565b91505092915050565b600081519050919050565b600082825260208201905092915050565b60005b83811015610330578082015181840152602081019050610315565b60008484015250505050565b6000610347826102f6565b6103518185610301565b9350610361818560208601610312565b61036a81610171565b840191505092915050565b6000602082019050818103600083015261038f818461033c565b905092915050565b7f4e487b7100000000000000000000000000000000000000000000000000000000600052602260045260246000fd5b600060028204905060018216806103de57607f821691505b6020821081036103f1576103f0610397565b5b50919050565b60008190508160005260206000209050919050565b60006020601f8301049050919050565b600082821b905092915050565b6000600883026104597fffffffffffffffffffffffffffffffffffffffffffffffffffffffffffffffff8261041c565b610463868361041c565b95508019841693508086168417925050509392505050565b6000819050919050565b6000819050919050565b60006104aa6104a56104a08461047b565b610485565b61047b565b9050919050565b6000819050919050565b6104c48361048f565b6104d86104d0826104b1565b848454610429565b825550505050565b600090565b6104ed6104e0565b6104f88184846104bb565b505050565b5b8181101561051c576105116000826104e5565b6001810190506104fe565b5050565b601f82111561056157610532816103f7565b61053b8461040c565b8101602085101561054a578190505b61055e6105568561040c565b8301826104fd565b50505b505050565b600082821c905092915050565b600061058460001984600802610566565b1980831691505092915050565b600061059d8383610573565b9150826002028217905092915050565b6105b6826102f6565b67ffffffffffffffff8111156105cf576105ce610182565b5b6105d982546103c6565b6105e4828285610520565b600060209050601f8311600181146106175760008415610605578287015190505b61060f8582610591565b865550610677565b601f198416610625866103f7565b60005b8281101561064d57848901518255600182019150602085019450602081019050610628565b8683101561066a5784890151610666601f891682610573565b8355505b6001600288020188555050505b505050505050565b600073ffffffffffffffffffffffffffffffffffffffff82169050919050565b60006106aa8261067f565b9050919050565b6106ba8161069f565b82525050565b60006040820190506106d560008301856106b1565b81810360208301526106e7818461033c565b9050939250505056fea2646970667358221220b73a35f7115c3a3bd7064d103c9df452f2202170fb44b021de500dec483bb6fa64736f6c63430008130033";

/**
 * @dev Berachain testnet block explorer
 */
const BLOCK_EXPLORER = "https://brtio.beratrail.io/";

// Main Page
// ========================================================
export default function Deploy() {
  // Hooks
  const { address, isConnected, connector } = useAccount();
  const [transactionHash, setTransactionHash] = useState("");
  const [greeting, setGreeting] = useState("");
  const [isLoading, setIsloading] = useState(false);
  const [error, setError] = useState("");

  const receipt = useWaitForTransactionReceipt({
    chainId: berachainTestnet.id,
    hash: transactionHash ? (`${transactionHash}` as `0x${string}`) : undefined
  });

  // Functions
  /**
   * @dev function that handles sending a transaction to the blockchain
   */
  const deployContract = async (event: React.FormEvent<HTMLFormElement>) => {
    event.preventDefault();
    setTransactionHash("");
    setError("");

    console.group("deployContract");
    setIsloading(true);
    try {
      // Why not use? usePrepareTransactionRequest or useSendTransaction
      // Not enough documentation from wagmi on how to do a simple `eth_sendTransaction` with bytecode and not provide `to` param
      const provider = (await connector?.getProvider()) as any;
      console.log({ provider });
      console.log({ request: provider?.request });
      console.log({ greeting });

      // Based on constructor - constructor(string memory _greeting) {
      const encodedData = encodeAbiParameters(
        [{ name: "_greeting", type: "string" }],
        [`${greeting}`]
      );

      // Need slide(2) to remove 0x from encodedData at the beginning
      const fullByteCode = `${CONTRACT_BYTECODE}${encodedData.slice(2)}` as `0x${string}`;

      // Process trasaction
      const tx = await provider.request({
        method: "eth_sendTransaction",
        params: [
          {
            from: address,
            data: fullByteCode
          }
        ]
      });

      // Get the transaction hash
      setTransactionHash(tx);

      // Refetch wait for receipt
      receipt.refetch();
    } catch (error: any) {
      console.error(error?.message);
      console.error(error?.reason);
      console.error(error);
      setError(error?.message);
    }
    setIsloading(false);
    console.groupEnd();
  };

  // Render
  return (
    <section className="pb-6 mb-6 border-zinc-700 border-b">
      <>
        <h2>Deploy Contract</h2>
        {isConnected ? (
          <div>
            <form onSubmit={deployContract}>
              <div>
                <label>HelloWorld.sol</label>
                <pre>
                  <code>{JSON.stringify(CONTRACT_ABI, null, "   ")}</code>
                </pre>
              </div>
              <div>
                <label htmlFor="_greeting">_greeting</label>
                <input
                  disabled={isLoading}
                  placeholder="Ex: Hello There!"
                  type="text"
                  name="_greeting"
                  id="_greetine"
                  value={greeting}
                  onChange={(e) => setGreeting(e.target.value)}
                />
              </div>
              <div>
                <label>ByteCode</label>
                <pre>
                  <code>{CONTRACT_BYTECODE}</code>
                </pre>
              </div>
              <div>
                <button disabled={isLoading || greeting.length === 0} type="submit">
                  Deploy
                </button>
              </div>
            </form>

            <div>
              <label>Transaction Hash Result</label>
              <pre>
                <code>
                  {transactionHash}
                  {error}
                </code>
              </pre>
              {transactionHash ? (
                <p>
                  <a
                    className="button"
                    href={`${BLOCK_EXPLORER}/tx/${transactionHash}`}
                    target="_blank"
                  >
                    Beratrail Tx Link
                  </a>
                </p>
              ) : null}
            </div>

            <div>
              <label>Transaction Receipt</label>
              <pre>
                <code>
                  {receipt.status === "pending"
                    ? `Status: ${receipt.status}\n\nWaiting...`
                    : ""}
                  {receipt.status === "error"
                    ? `Status: ${receipt.status}\n\n${receipt?.failureReason?.message}`
                    : ""}
                  {receipt.status === "success"
                    ? `Status: ${receipt.status}\n\n${receipt?.data?.contractAddress}`
                    : ""}
                </code>
              </pre>

              {receipt?.data?.contractAddress ? (
                <p>
                  <a
                    className="button"
                    href={`${BLOCK_EXPLORER}address/${receipt?.data?.contractAddress}`}
                    target="_blank"
                  >
                    Beratrail Contract Address Link
                  </a>
                </p>
              ) : null}
            </div>
          </div>
        ) : (
          <div>
            <pre>
              <code>Not Connected</code>
            </pre>
          </div>
        )}
      </>
    </section>
  );
}
Add this component to our main page.tsx file.
File: ./app/page.tsx
// Imports
// ========================================================
import Account from "@/components/Account";
import SignMessage from "@/components/SignMessage";
import Deploy from "@/components/Deploy";

// Main Page
// ========================================================
export default function Home() {
  // Render
  return (
    <main className="p-8">
      <h1>🐻⛓️ Berachain WalletConnect Web3Modal Example</h1>
      <p>An example of Berachain being used with WalletConnect.</p>
      <div className="mb-8">
        <w3m-button />
      </div>
      <Account />
      <SignMessage />
      <Deploy /> // [!code ++]
    </main>
  );
}
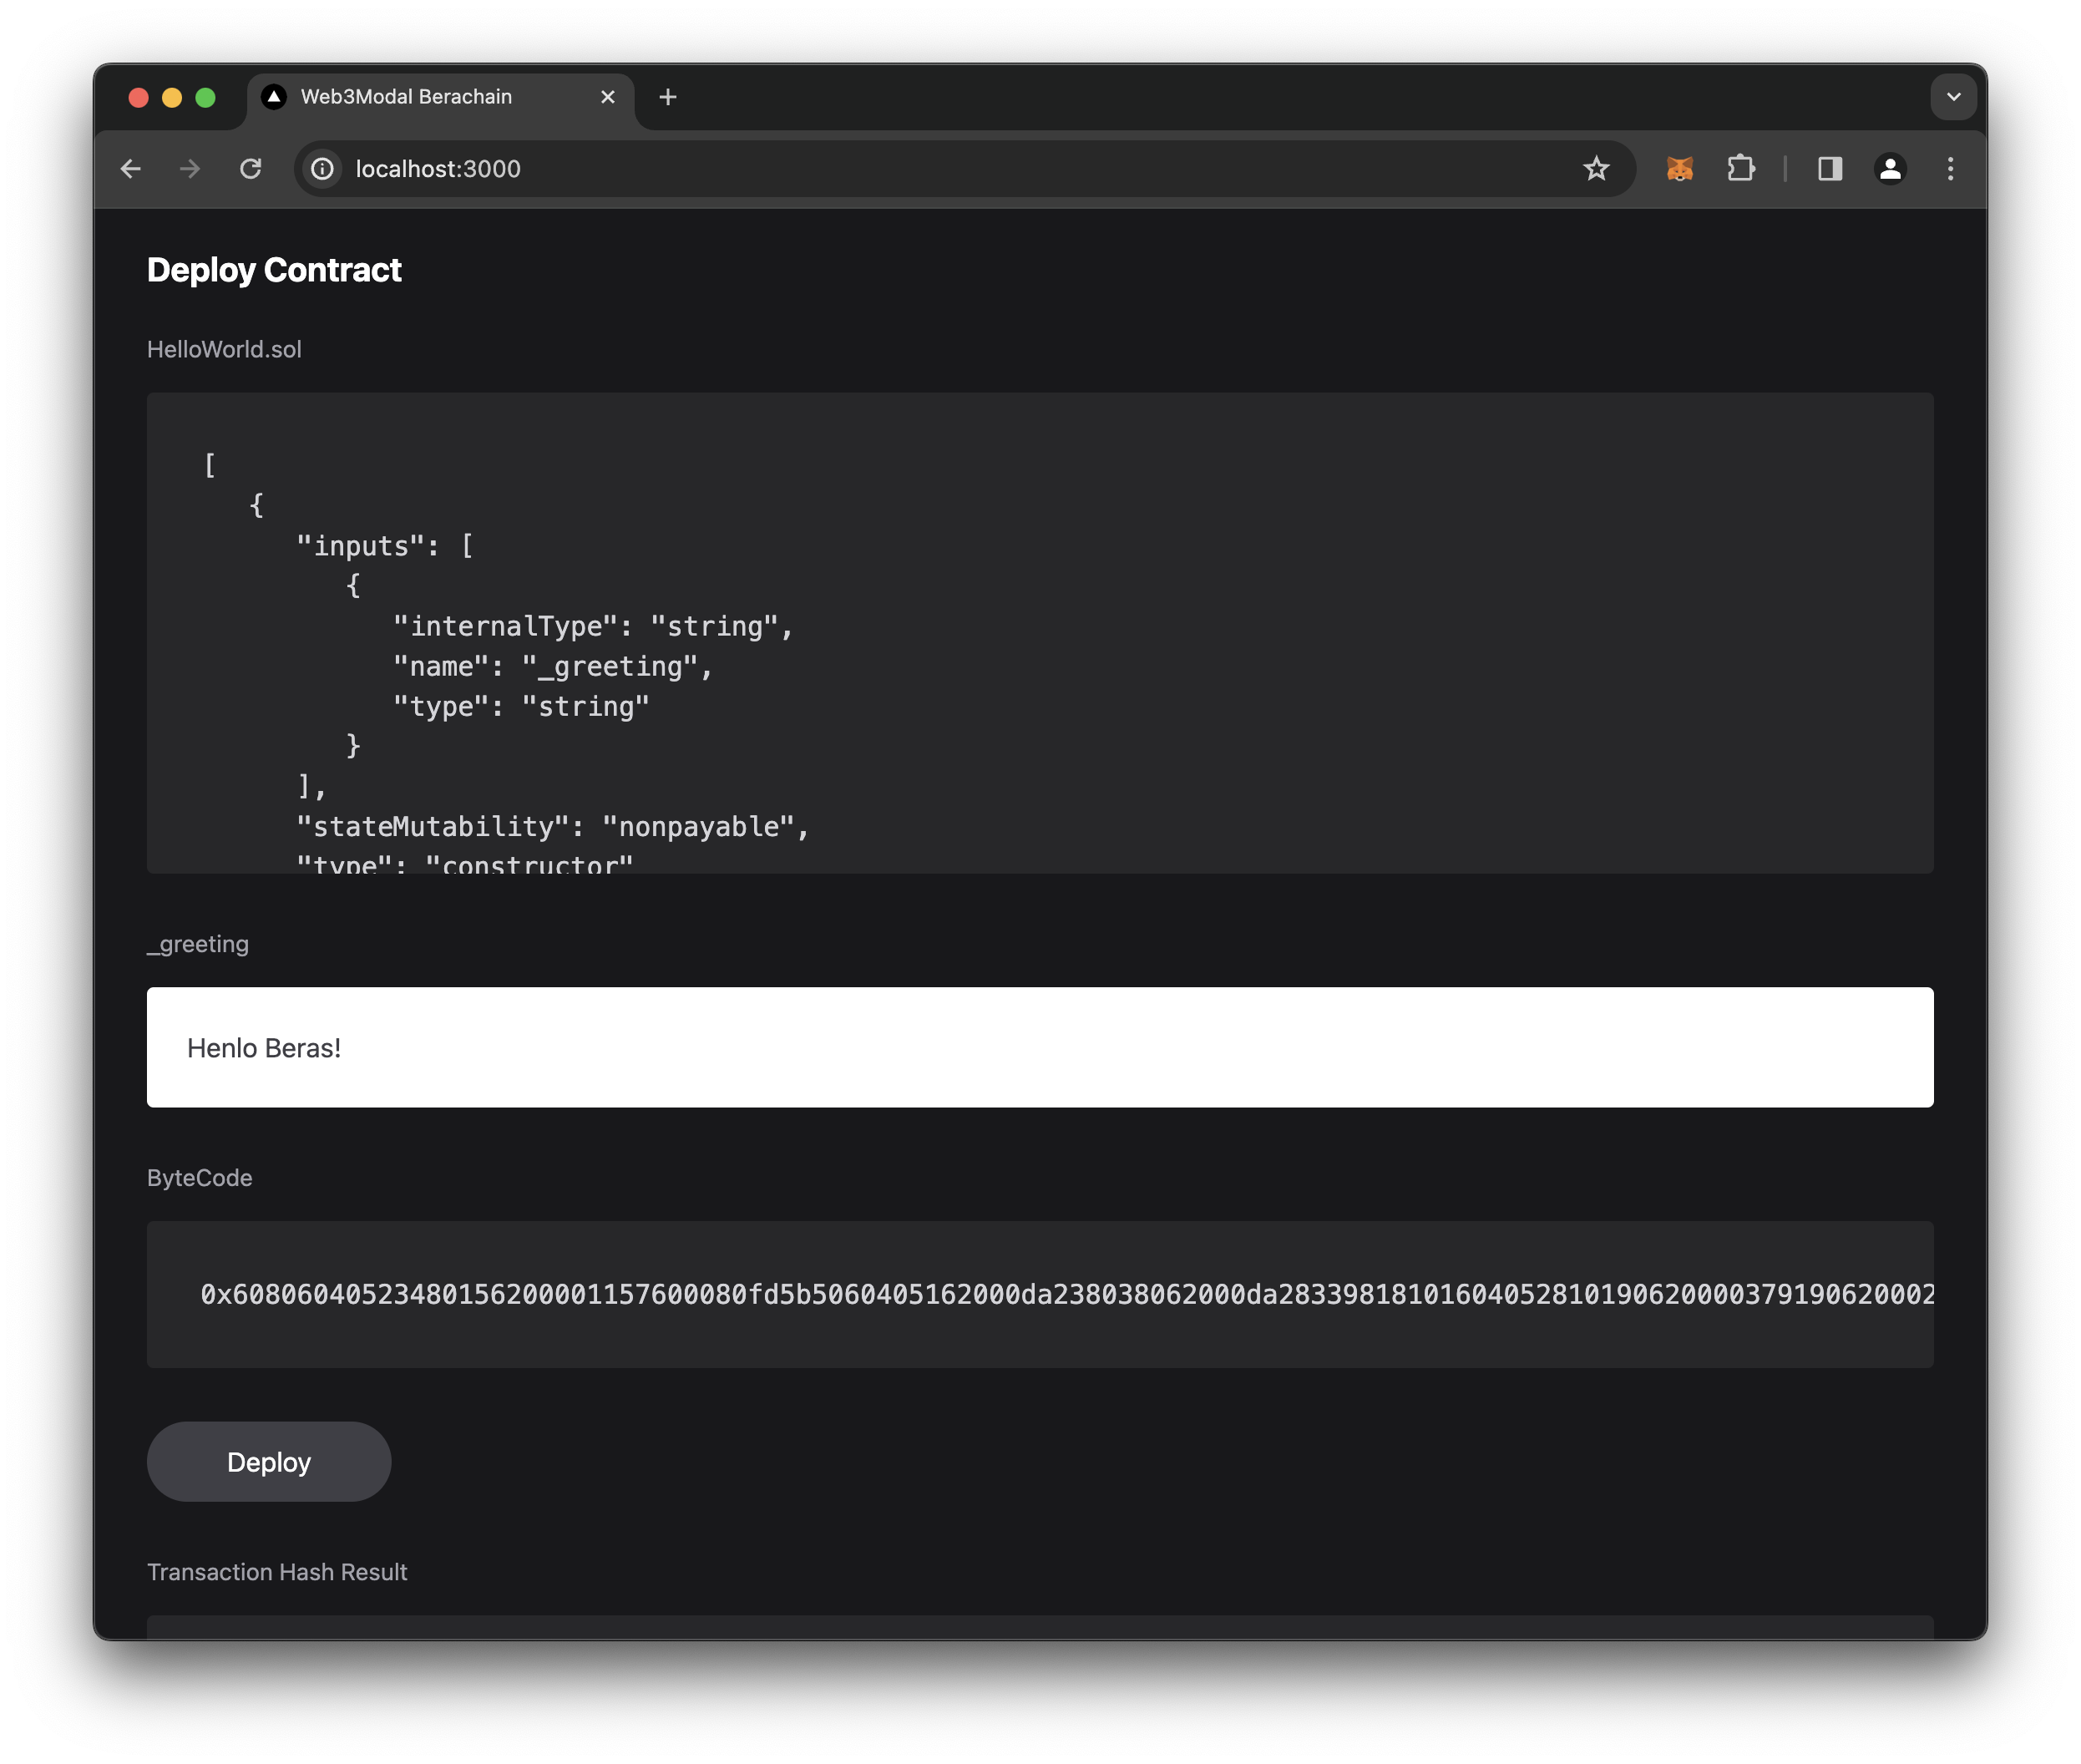
With the new deploy functionality, we can set an initial greeting.
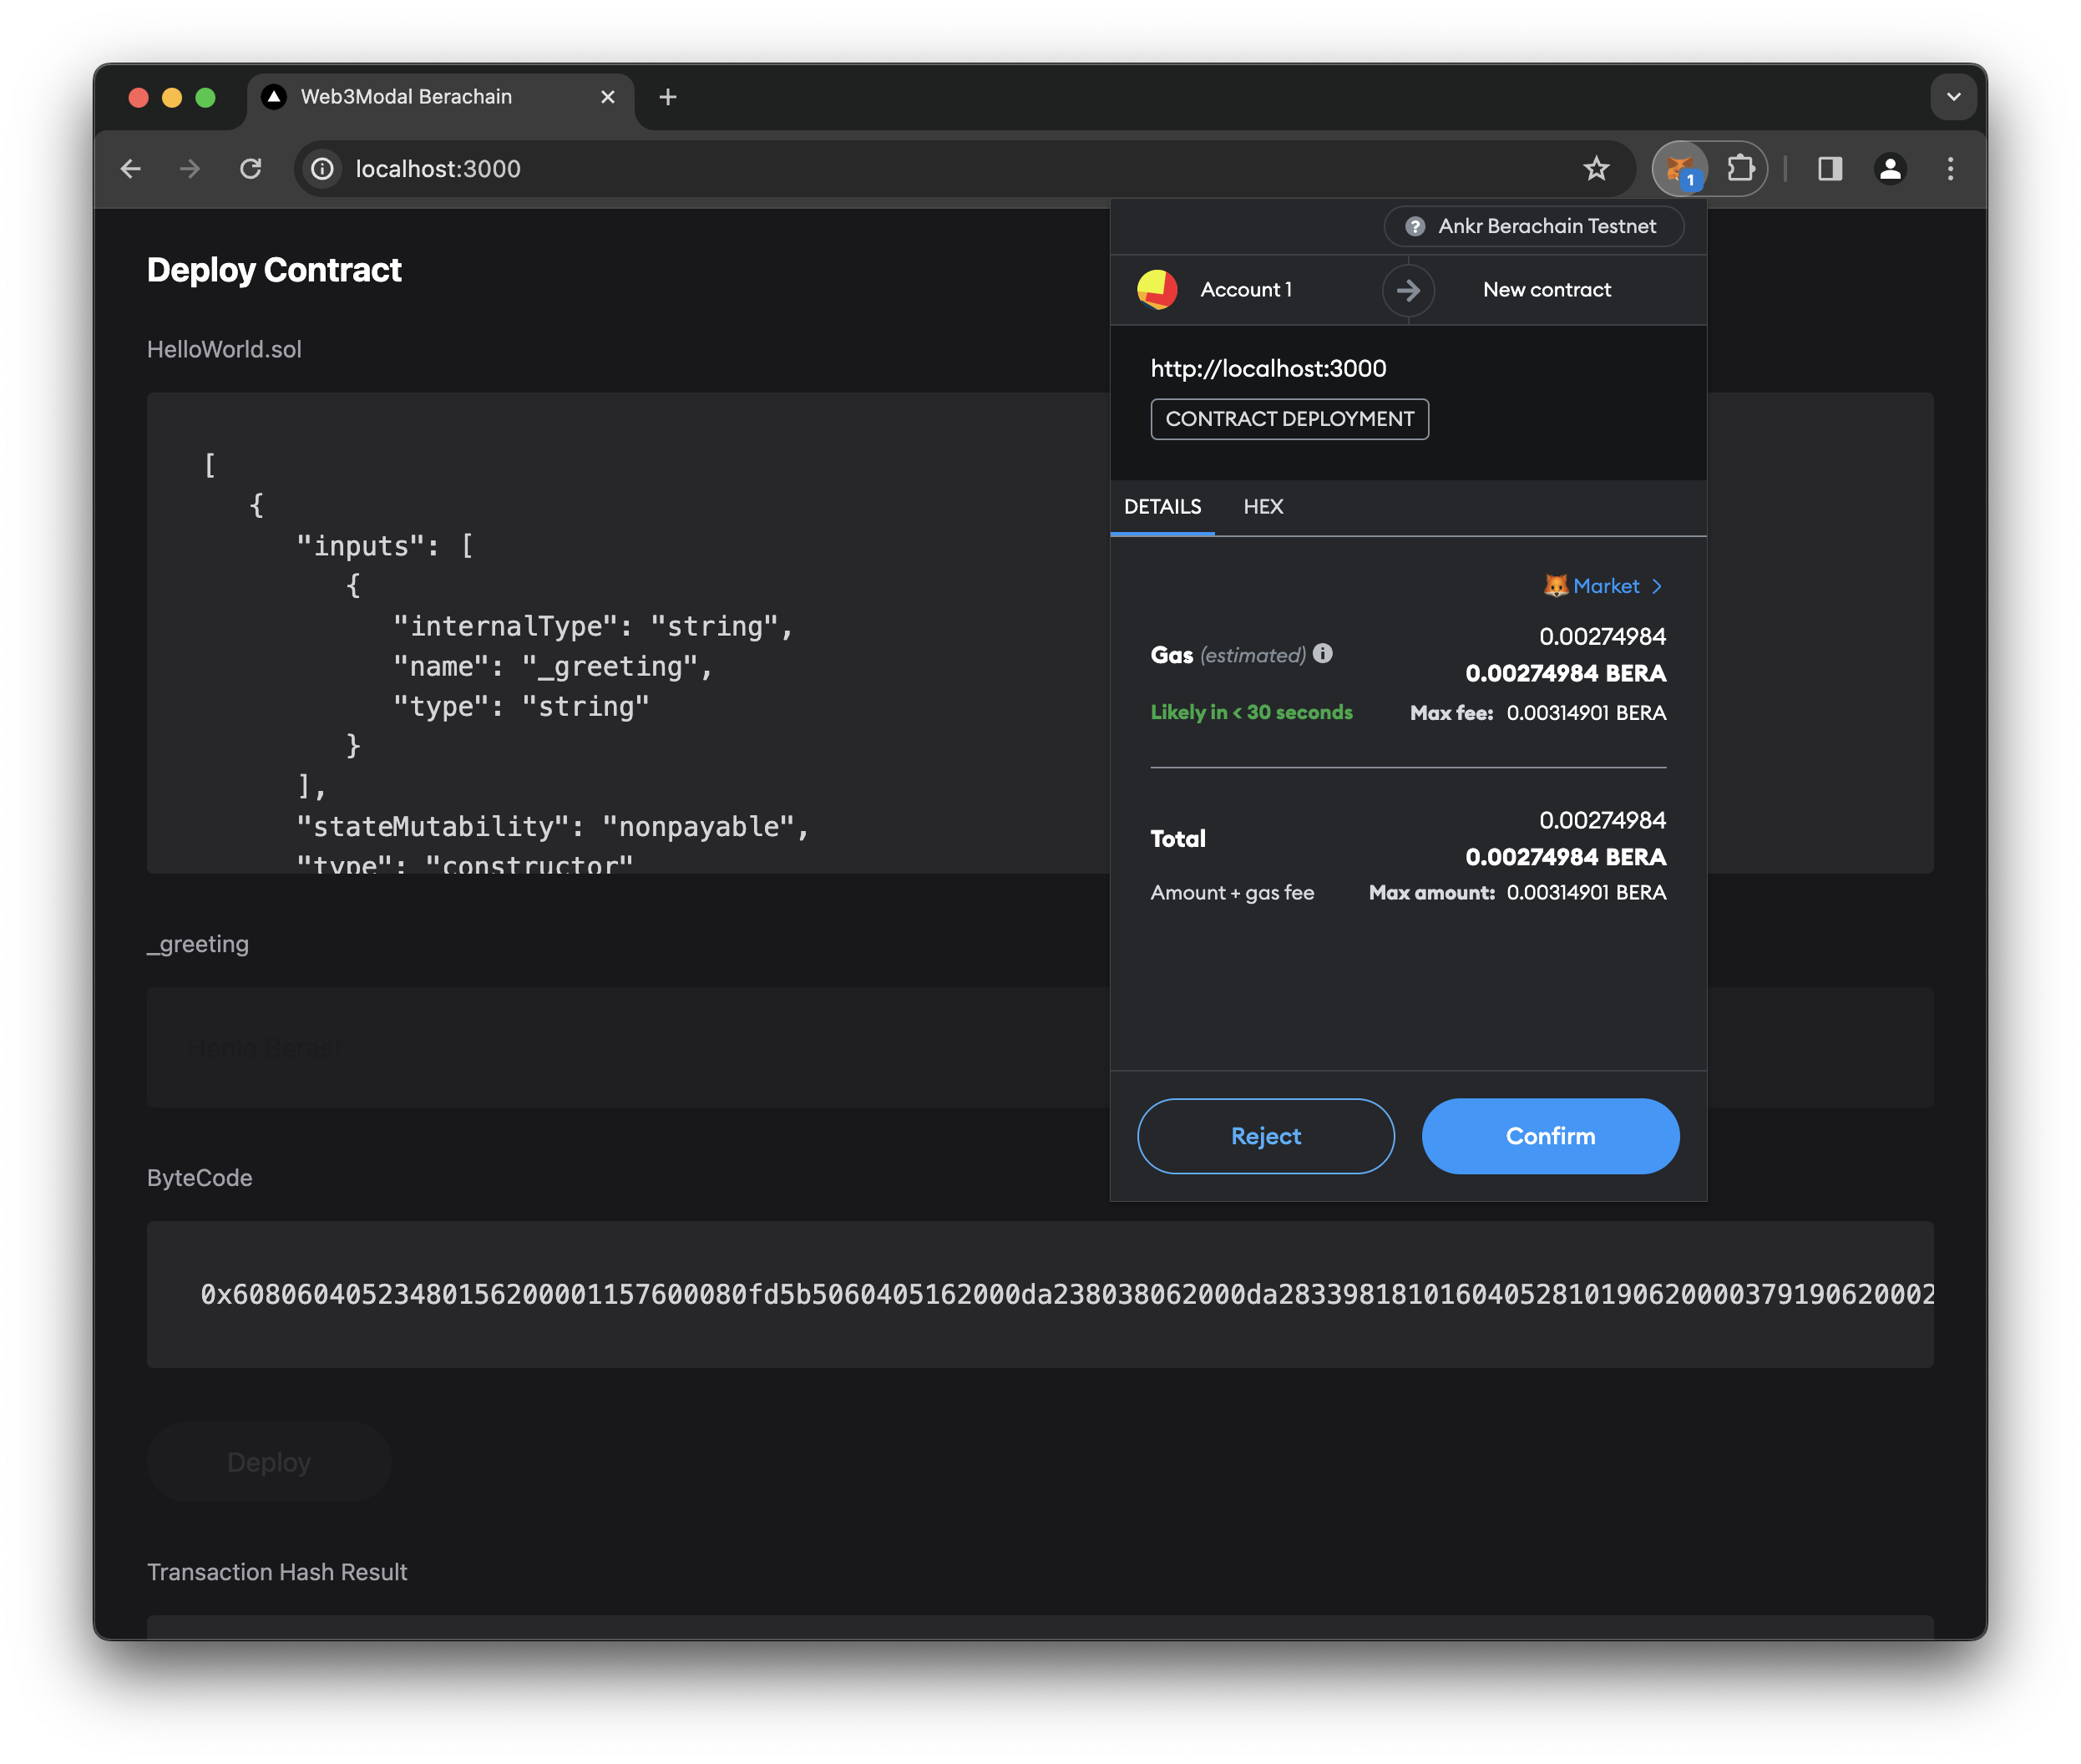
Confirm the transaction.
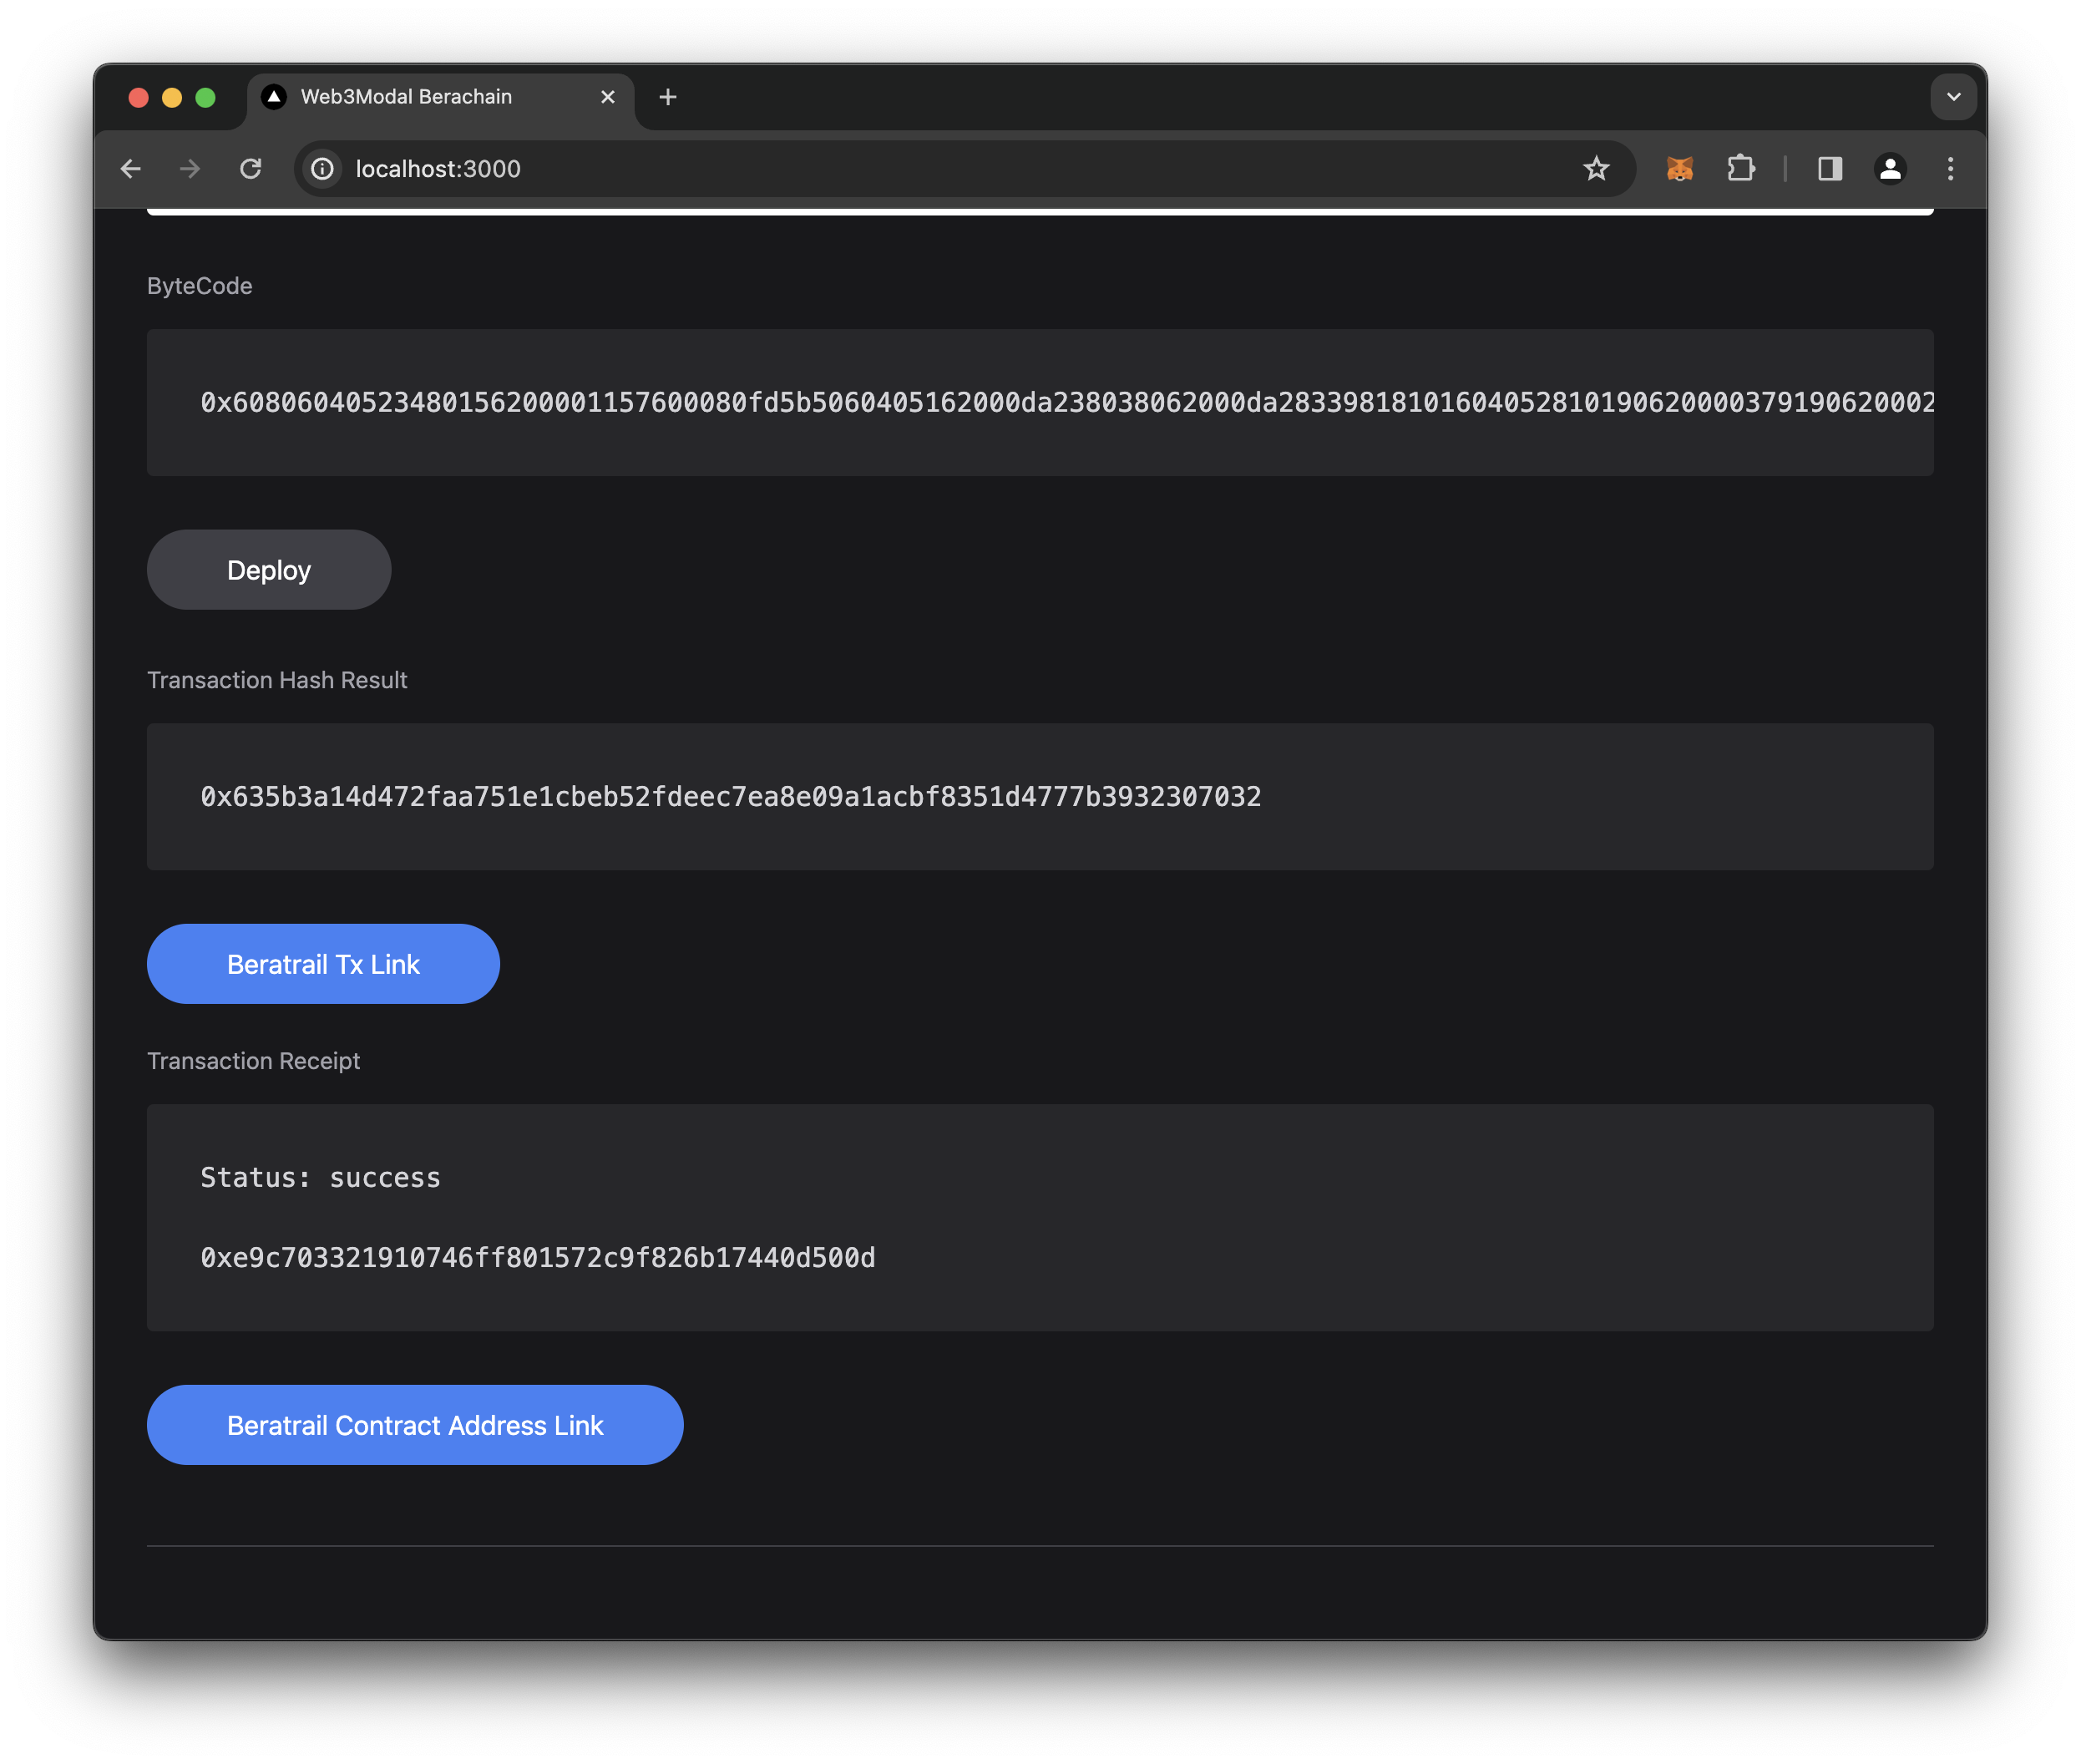
See a successful transaction and click Beratrail Contract Address Link.
NOTE: This may take a little bit to show up on the frontend.
See the result in Beratrail.
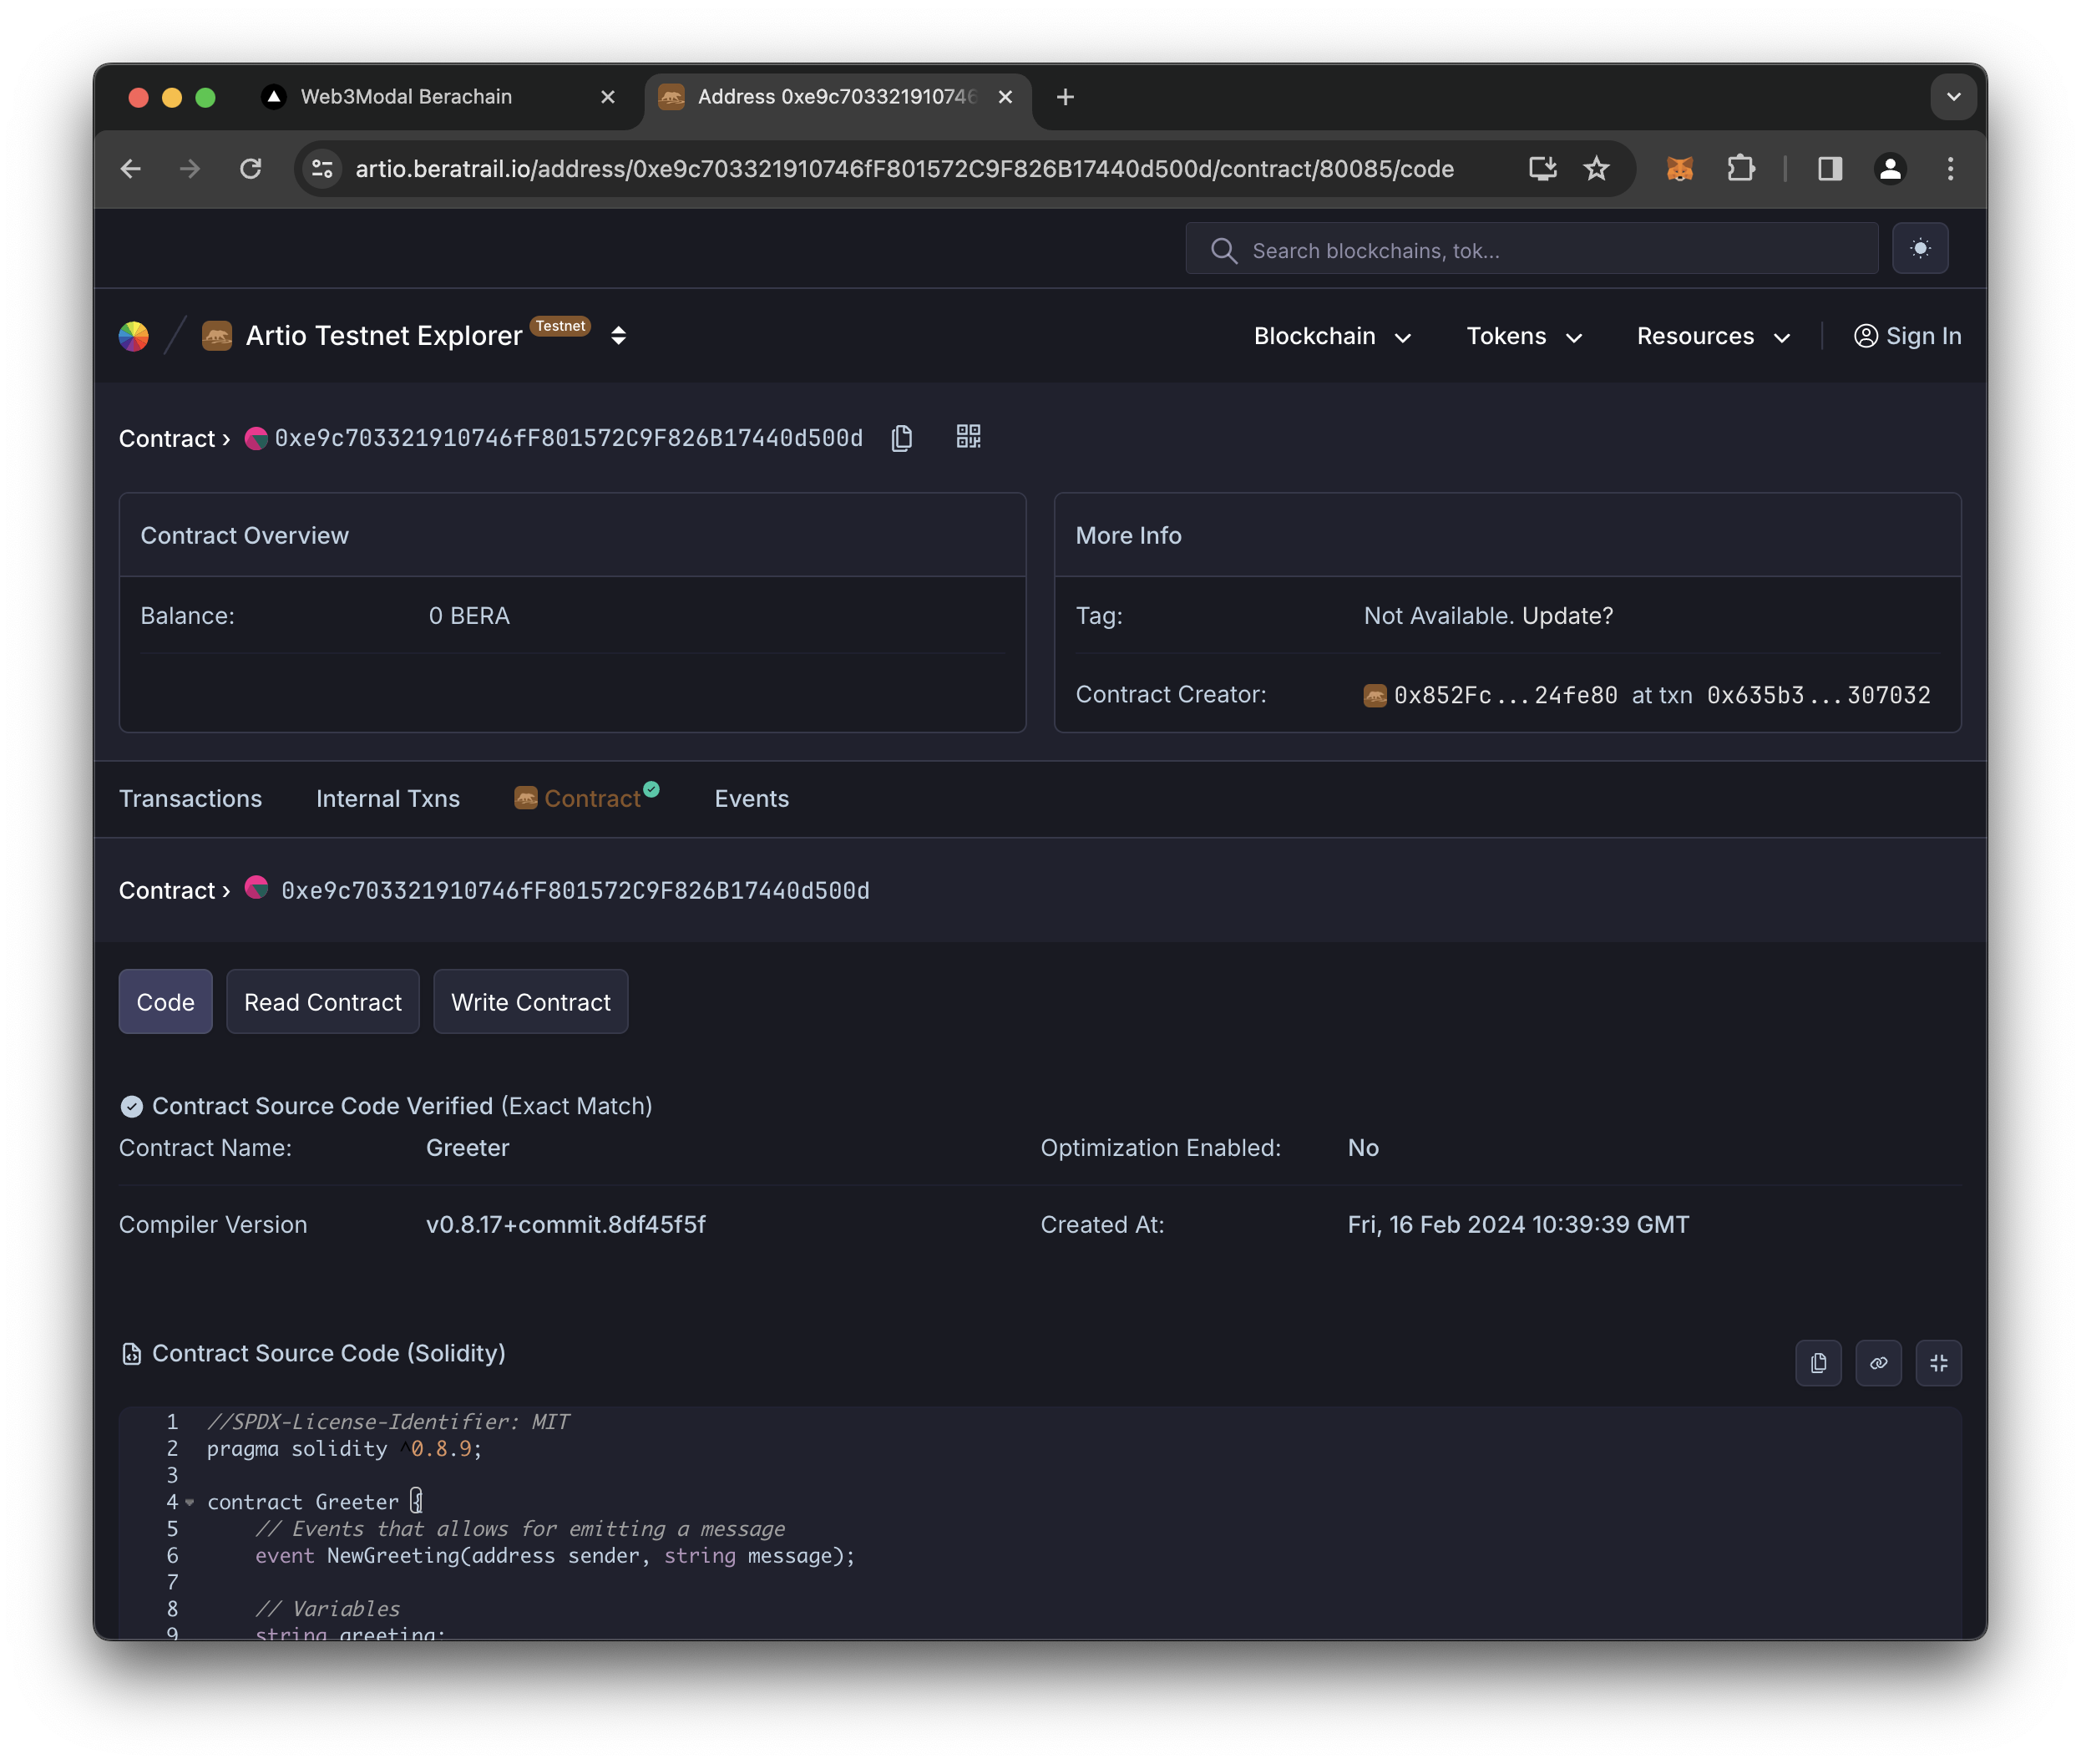
And that's it, we've successfully integrated WalletConnect Web3Modal with Berachain.
Full Code Repository
The full github code repository can be found in the guides section of this repository under NextJS WalletConnect.